If you have ever wanted to bake bread but dreaded all the hard labor that comes with it, then you are in for a treat with the World’s Easiest No-Knead Artisan Yeast Bread Recipe. This recipe is a total game changer, offering a gloriously crusty, chewy loaf that tastes like it came from a fancy bakery — but requires almost zero effort. All you need is a few simple ingredients and a little patience, and you’ll be rewarded with fresh, homemade artisan bread that will have you wondering why you ever bought store-bought again.
Ingredients You’ll Need
Believe it or not, this delightful bread needs just a handful of ingredients that are pantry staples for most. Each element is carefully chosen to create that perfect balance: chewy crumb, golden crust, and subtle yeast flavor that makes artisan bread so irresistible.
- 3 cups (450g) flour: Use bread flour for a chewier texture or plain/all-purpose flour for a softer feel—both work beautifully.
- 2 tsp instant or rapid-rise yeast: The magic behind the rise; instant yeast jumpstarts fermentation without requiring prior proofing.
- 2 tsp cooking/kosher salt: Enhances flavor and tightens gluten structure for better dough strength. Avoid table salt here for best results.
- 1 1/2 cups (375 ml) very warm tap water: Just warm enough to activate the yeast without killing it—think around 55°C/130°F.
- 1 1/2 tbsp flour for dusting: Helps prevent sticking while shaping the dough—simple but essential.
How to Make World’s Easiest No-Knead Artisan Yeast Bread Recipe
Step 1: Mix Dough
In a large bowl, combine your flour, yeast, and salt, then add the warm water. Using the handle of a wooden spoon, stir until all the flour is fully incorporated. The dough will feel wet and sloppy, not the stretchy kind you might expect from traditional bread dough, but that’s exactly right here. If it feels too sticky or too dry, feel free to tweak it gently—this dough should hold together but remain quite loose.
Step 2: Rise
Cover the bowl with cling wrap or a plate, and let it rest undisturbed on the counter for 2 to 3 hours. You’ll know it’s ready when it roughly doubles in size and jiggles softly like jelly with bubbly tops—proof that the yeast is hard at work, turning simple ingredients into something amazing. If after an hour the rise seems slow, just move the dough to a warmer spot to encourage fermentation.
Step 3: Optional Refrigeration for Flavor Development
If patience is your friend, pop the dough into the fridge for up to three days at this stage. This slow cold fermentation deepens the bread’s flavor without any extra effort. When you’re ready to bake, just bring it back to room temperature and continue on to shaping.
Step 4: Bring Dough to Room Temperature
If you’ve refrigerated the dough, remove it from the fridge and allow it to sit on your countertop for 45 to 60 minutes before baking. Cold dough tends to rise less efficiently in the oven, so this step makes sure your loaf gets that lovely, airy texture.
Step 5: Preheat Oven and Dutch Oven
Place a dutch oven with its lid on inside your oven and preheat to 230°C/450°F (or 220° fan) for at least 30 minutes. This step is crucial because the hot pot creates steam around your dough, which gives you that enviable crust. If you don’t have a dutch oven, a heavy oven-safe pot with a lid will also work wonderfully.
Step 6: Shape Dough
Lightly flour your workspace with 1 tablespoon of flour, then gently scrape the dough out of the bowl. Dust the top with another half tablespoon of flour to prevent sticking while you shape.
Step 7: Fold to Form Shape
Using a dough scraper or a similar tool like a cake server or spatula, fold the dough’s edges inward about six times until you get a rough round shape. Don’t worry about perfection here—the goal is to deflate large bubbles and form a shape easy to handle. Imperfections actually result in more delightful ridges and crust later.
Step 8: Transfer Dough to Parchment Paper
Slide a large piece of parchment paper next to your dough, then carefully flip the dough upside down onto the paper. The seam side should be down and the smooth side facing up. Gently nudge it into a round shape again without stressing over it—you want rustic charm, not perfect symmetry.
Step 9: Place Dough into Hot Dutch Oven
Carefully remove your piping-hot dutch oven from the oven. Grab the parchment paper underneath the dough and transfer the whole thing into the pot. Place the lid back on to trap steam inside, ready to work its crust-forming magic.
Step 10: Bake Covered and Uncovered
Bake the bread covered for 30 minutes, then remove the lid and bake for an additional 12 minutes or until the crust turns a deep golden-brown color and is satisfyingly crispy. The aroma will fill your kitchen and make waiting almost impossible.
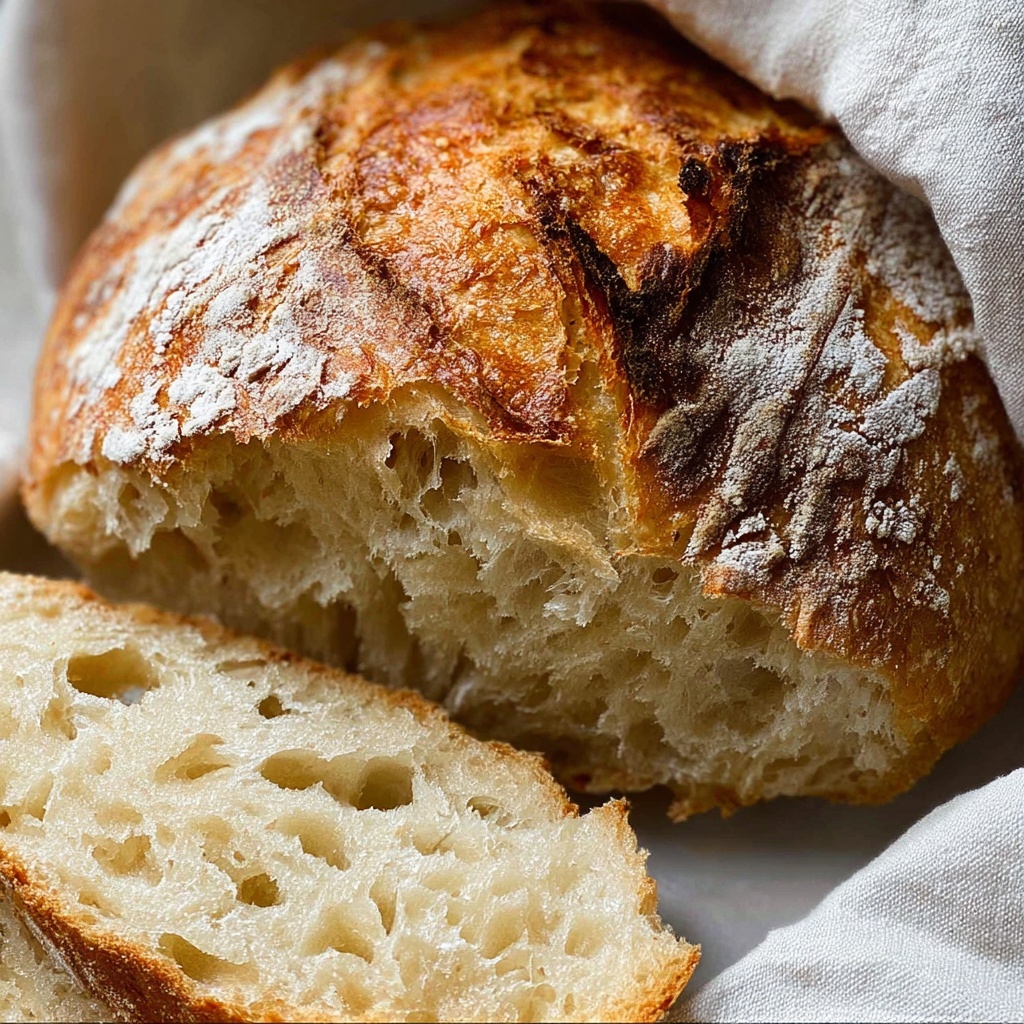
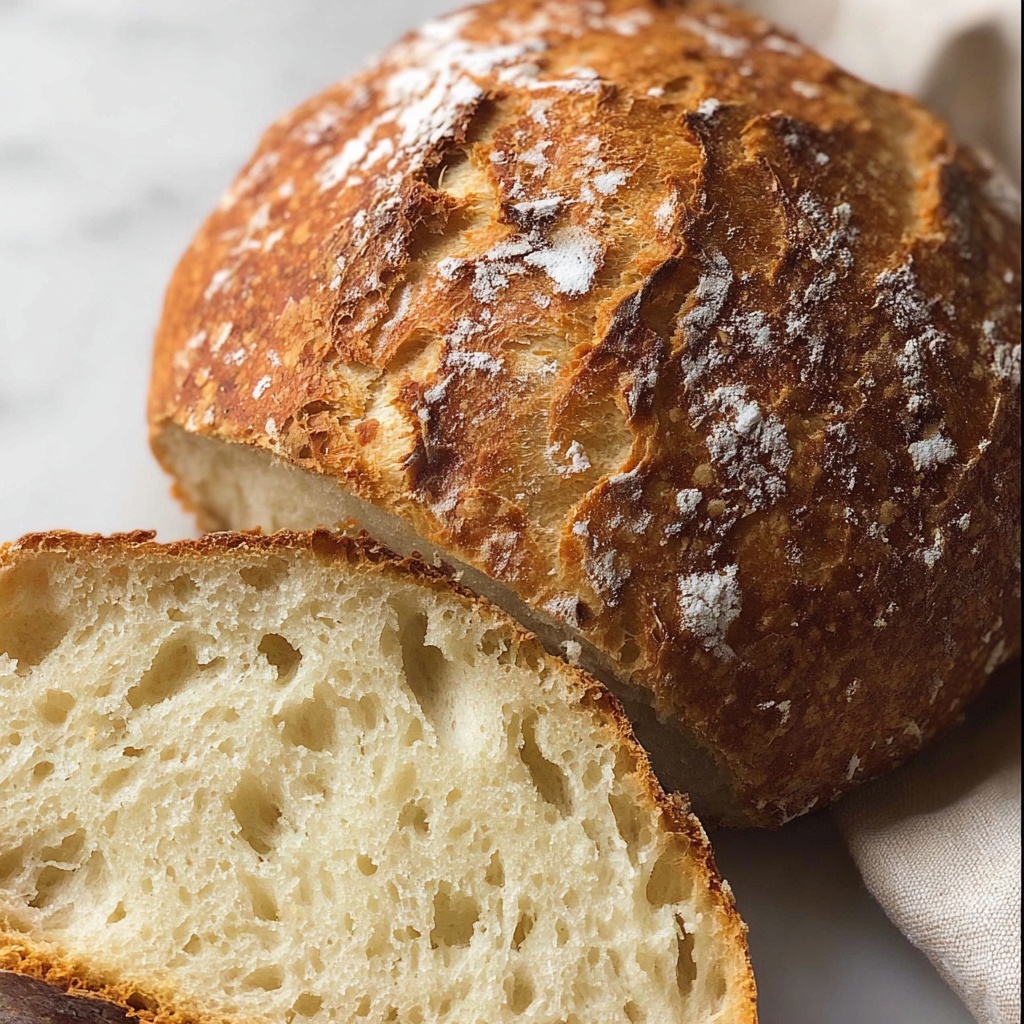
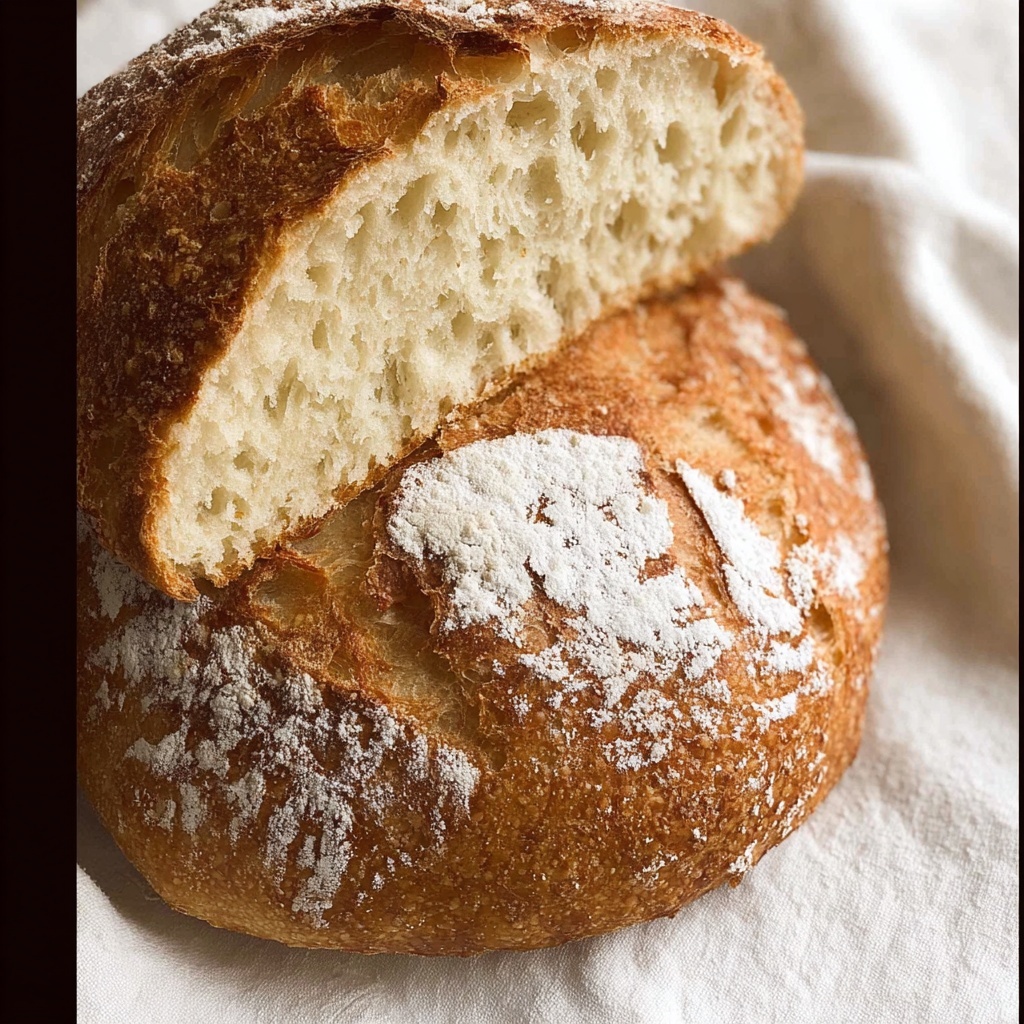
Step 11: Cool Before Slicing
Once baked, transfer your loaf to a wire rack and cool for at least 10 minutes. This resting period lets the crumb set before slicing—cutting too early can result in a gummy texture, and we don’t want that for our perfect artisan bread!
How to Serve World’s Easiest No-Knead Artisan Yeast Bread Recipe
Garnishes
This bread is a blank canvas that welcomes a variety of garnishes. A swipe of softened butter crowned with flaky sea salt or a drizzle of extra virgin olive oil and a sprinkle of fresh rosemary elevate the simple flavor beautifully. For a sweeter touch, try jam or honey on your slices—each options highlights the bread’s rustic charm.
Side Dishes
The perfect companion to this bread is anything from creamy soups to bold cheeses. Imagine dunking a warm slice into tomato basil soup or pairing it with a sharp cheddar cheese plate. It also shines alongside Mediterranean spreads like hummus or baba ganoush, turning any meal into a gourmet experience.
Creative Ways to Present
Presentation is half the fun when you bring this bread to the table. Slice it into thick or thin pieces and fan them out on a wooden cutting board for an approachable, rustic look. You can also hollow out a loaf to make a hearty bread bowl or toast slices and top them with smashed avocado and cherry tomatoes for a quick party appetizer.
Make Ahead and Storage
Storing Leftovers
If you find yourself with extra bread, store it in a paper bag or loosely wrapped kitchen towel at room temperature to maintain the crust’s crunch. Avoid plastic bags as they trap moisture and encourage sogginess. Properly stored, the bread stays fresh for up to two days.
Freezing
This bread freezes wonderfully and makes quick weeknight meals a breeze. Wrap the whole or sliced loaf tightly in plastic wrap, then place it inside a freezer bag. Frozen bread keeps well for up to three months. When you’re ready to enjoy, just defrost at room temperature or pop slices directly into your toaster.
Reheating
To revive the crust and warm the crumb, reheat slices in a preheated oven at 180°C/350°F for about 10 minutes wrapped loosely in foil. For the full loaf, remove plastic wrapping and place it in a dutch oven or baking tray, covering with foil to avoid burning. This simple step restores that fresh-baked allure in minutes.
FAQs
Can I use active dry yeast instead of instant yeast?
Absolutely! If using active dry yeast, just dissolve it in the warm water first and let it sit for 5 to 10 minutes until bubbly before mixing with the flour and salt. This extra step activates the yeast properly and ensures a good rise.
What if my dough doesn’t rise much?
Yeast activity depends heavily on temperature. If your kitchen is chilly, move the dough to a warmer spot or even a slightly warm oven (turned off, but with the light on). Also, double-check that your yeast isn’t expired—it needs to be alive and active to do its job well.
Do I need a dutch oven to make this bread?
While a dutch oven creates the ideal steam environment for a crusty loaf, you can still bake this bread on a preheated baking stone or sheet. To replicate steam, place a pan of hot water in the oven or spray the oven walls with water when you put the bread in.
Can I add herbs or other flavors to the dough?
Yes! Feel free to fold in chopped fresh herbs like rosemary or thyme, garlic powder, or even grated cheese before the first rise. The core recipe is very forgiving and lends itself well to creative variations.
How long does the bread stay fresh after baking?
Freshly baked loaf is best enjoyed within two days, as the crust starts to soften after that. However, proper storage and reheating can help extend enjoyment for several more days with minimal quality loss.
Final Thoughts
I can’t recommend enough giving the World’s Easiest No-Knead Artisan Yeast Bread Recipe a try. It’s the kind of recipe that wins over both beginner and seasoned bakers alike because it breaks down barriers and delivers stunning results without stress. Once you taste that crunchy golden crust and soft, flavorful crumb fresh from your oven, you’ll be hooked. Happy baking, and enjoy every warm slice!
Print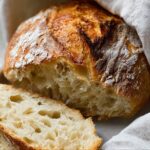
World’s Easiest No-Knead Artisan Yeast Bread Recipe
- Prep Time: 5 minutes
- Cook Time: 40 minutes
- Total Time: 2 hours 45 minutes (plus optional refrigeration time)
- Yield: 10 to 12 slices (1 standard loaf)
- Category: Bread
- Method: Baking
- Cuisine: Artisan
Description
This World’s Easiest Yeast Bread recipe is a no-knead artisan loaf perfect for home bakers seeking simplicity without sacrificing flavor. Using just flour, yeast, salt, and warm water, this recipe requires minimal hands-on time and yields a crusty, golden bread with a tender crumb. Oven-baked in a hot Dutch oven, it develops a crisp exterior and soft interior, making it ideal for sandwiches, toasts, or enjoying fresh out of the oven.
Ingredients
Dry Ingredients
- 3 cups (450g) bread or plain/all-purpose flour
- 2 tsp instant or rapid rise yeast
- 2 tsp kosher salt (not table salt)
- 1 1/2 tbsp flour (for dusting)
Wet Ingredients
- 1 1/2 cups (375 ml) very warm tap water (up to 55°C/130°F, not boiling)
Instructions
- Mix Dough: In a large bowl, combine the flour, yeast, and kosher salt. Add the very warm water and mix with the handle of a wooden spoon until all the flour is incorporated. The dough will be wet and sticky, not kneadable but not runny like batter. Adjust water or flour slightly if needed to achieve the right consistency.
- Rise: Cover the bowl with cling wrap or a plate and leave it on the counter for 2 to 3 hours until the dough doubles in size, becomes wobbly like jelly, and shows bubbles on the surface. If after 1 hour the dough isn’t rising, move it to a warmer spot.
- Optional Refrigeration for Flavor: At this point, you can either proceed to bake immediately or refrigerate the dough for up to 3 days to develop deeper flavor.
- Bring Dough to Room Temperature: If refrigerated, remove the dough from the fridge and let it sit at room temperature for 45 to 60 minutes while preheating the oven to take the chill off and encourage rising.
- Preheat Oven and Dutch Oven: Place a Dutch oven (minimum 26cm/10″ diameter) with its lid inside your oven and preheat to 230°C/450°F (220°C fan) for at least 30 minutes prior to baking. If you don’t have a Dutch oven, see special note in Step 10.
- Shape Dough: Sprinkle 1 tablespoon of flour on your work surface. Scrape the dough out of the bowl onto the floured surface, then gently sprinkle the top with 1/2 tablespoon flour.
- Fold and Form Shape: Using a dough scraper or similar tool, fold the dough’s sides inward about six times to roughly form a round, deflating some bubbles. Perfection isn’t required, as the shape will change during baking.
- Transfer Dough to Parchment Paper: Place a large piece of parchment paper beside the dough, then flip the dough seam-side down onto the paper. Slide the dough to the middle and reshape it round-ish; a lopsided shape is fine and will create more crunchy edges.
- Place Dough in Hot Dutch Oven: Carefully remove the hot Dutch oven from your oven. Using the parchment paper as a sling, transfer the dough into the Dutch oven and cover with the lid.
- Bake Bread: Bake the covered dough for 30 minutes. Then remove the lid and bake uncovered for an additional 12 minutes or until the crust is deep golden and crispy. If you don’t have a Dutch oven, bake the dough on a heavy baking sheet or cast iron skillet covered loosely with a large mixing bowl or foil, then uncover for the last 12 minutes.
- Cool and Serve: Remove the bread from the oven and transfer it to a cooling rack. Let it cool for at least 10 minutes before slicing to allow the crumb to set properly.
Notes
- Use bread or all-purpose flour as preferred; bread flour yields a chewier bread.
- If using normal or active dry yeast, dissolve it in the warm water first and let it activate before mixing with flour and salt.
- Use kosher or cooking salt, not table salt, for best flavor and texture.
- Water should be warm but not hot, ideally up to 55°C/130°F to activate the yeast properly without killing it.
- Adjust water or flour to achieve a wet, sticky dough consistency; it should not be doughy or batter-like.
- If dough lacks rise after 1 hour, move to a warmer place such as near a radiator or in an oven with the light on.
- Preheating the Dutch oven is critical to create steam and a crispy crust.
- If you don’t have a Dutch oven, use a heavy baking sheet and cover the dough with a large oven-proof bowl or foil during the initial bake.
- Refrigeration enhances flavor, resulting in a more complex, tangy taste as the yeast ferments slowly.


