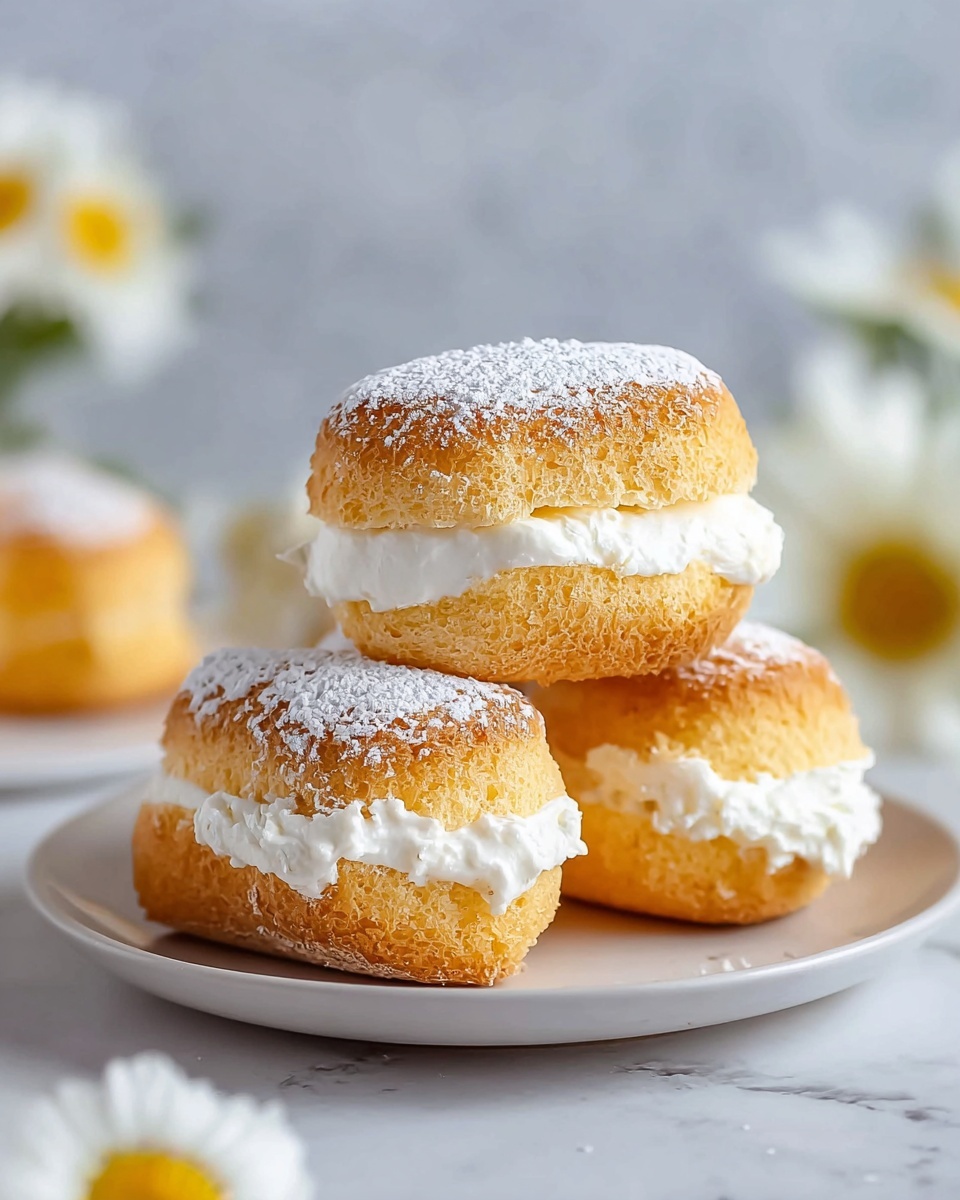
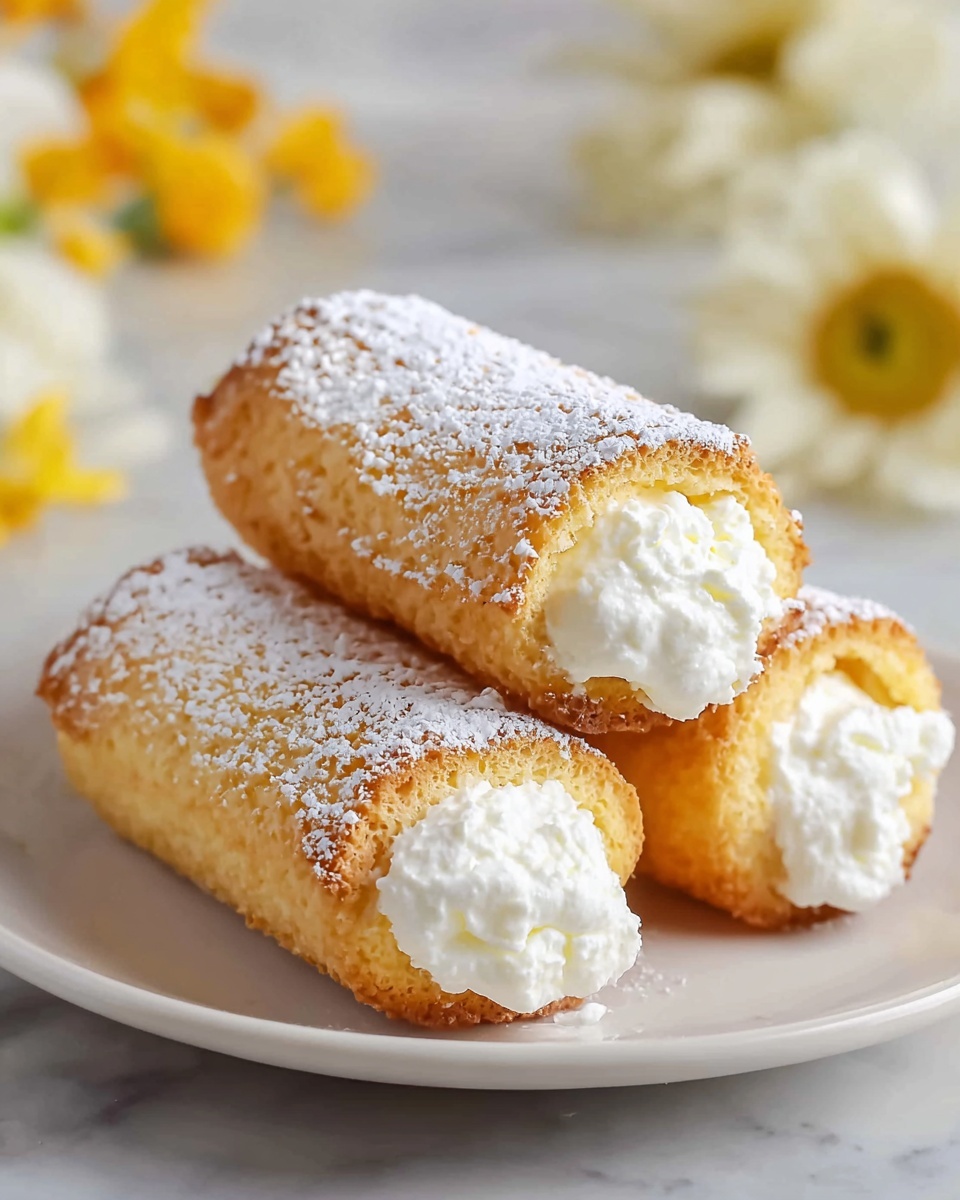
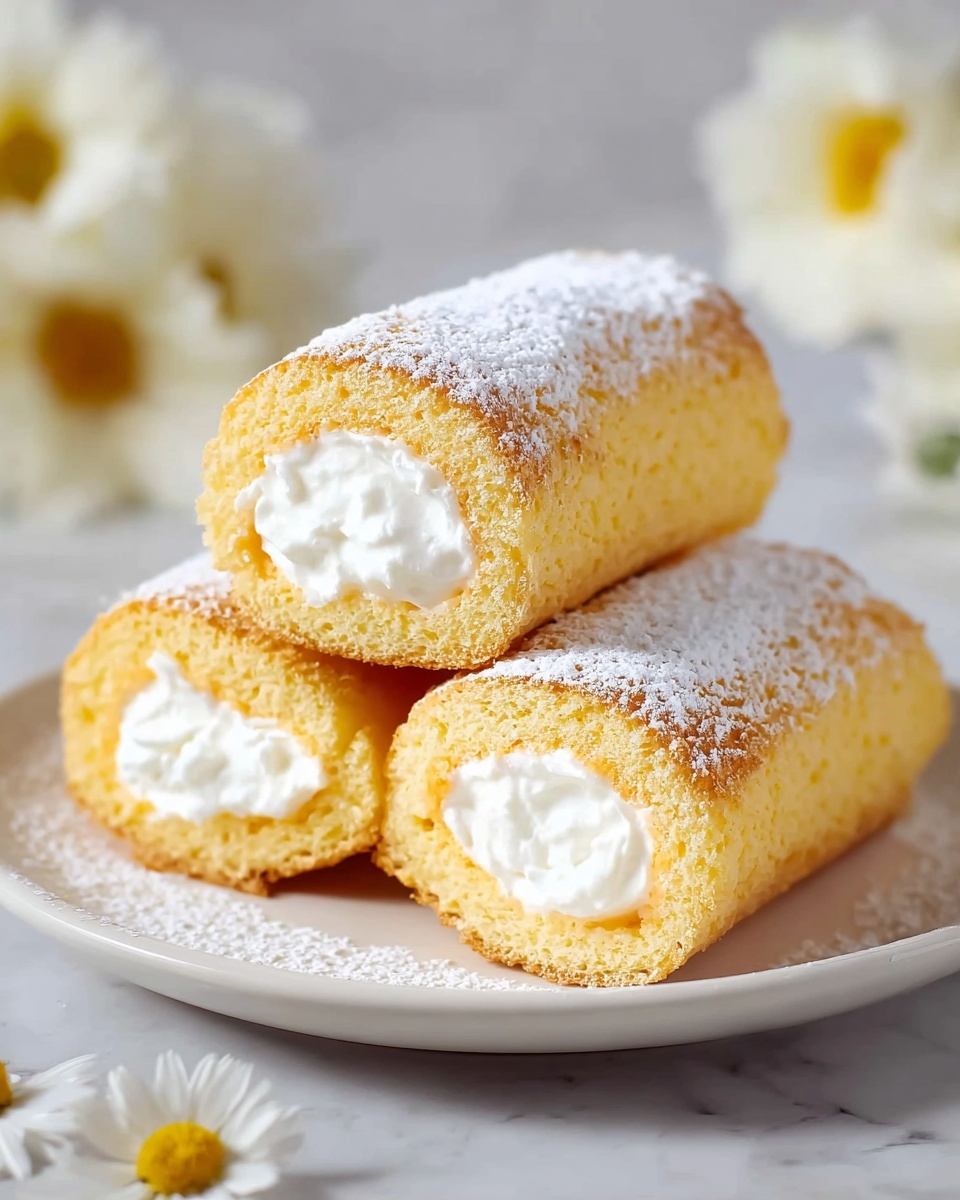
If you have a sweet tooth and a soft spot for nostalgic treats, this Homemade Twinkies Vanilla Cakes Recipe is a dream come true. These golden, fluffy little cakes filled with silky, cloud-like vanilla cream are the perfect combination of lightness and indulgence. From the tender cake exterior to the luscious filling inside, each bite transports you back to childhood memories while elevating the experience with a homemade touch. The beauty of this recipe lies in how approachable it is—simple ingredients come together in a way that feels both special and satisfying.
Ingredients You’ll Need
Every ingredient in this recipe plays a key role in achieving the perfect texture and flavor. From the delicate cake flour that keeps the crumb tender to the oil that adds moisture without heaviness, these essentials are easy to find and straightforward to use. Let’s break down what you’ll need and why each one matters.
- 250 grams cake flour, sifted: Provides a light, airy texture needed for the fluffy cake.
- 225 grams granulated sugar: Adds sweetness and helps with browning the cakes.
- 2 teaspoons baking powder: Gives lift to make the cakes springy and soft.
- 1 teaspoon salt: Enhances the overall flavor and balances the sweetness.
- 6 large eggs, room temperature: Eggs create structure and richness in the cake.
- 120 millilitres whole milk: Adds moisture and tenderness to the batter.
- 160 millilitres vegetable oil: Keeps the cakes moist without making them heavy.
- 1 tablespoon vanilla extract: Infuses the batter with warm, classic vanilla aroma.
- 2 large egg whites, room temperature (for filling): For that fluffy, marshmallow-like cream center.
- 135 grams granulated sugar (for filling): Sweetens and stabilizes the meringue filling.
- 40 millilitres water (for filling): Helps dissolve sugar for the syrup used in the filling.
How to Make Homemade Twinkies Vanilla Cakes Recipe
Step 1: Prepare Your Twinkie Pans and Oven
Start by preheating your oven to 177°C (350°F). While the oven warms up, generously spray your Twinkie-shaped cake pans with non-stick baking spray. This little step ensures your cakes will release easily and keep their perfect shape.
Step 2: Mix Dry Ingredients
In a large bowl, whisk together the sifted cake flour, sugar, baking powder, and salt. Combining the dry ingredients thoroughly at this stage guarantees even distribution of leavening agents for a light and tender crumb.
Step 3: Whisk Wet Ingredients
In a separate bowl, whisk the eggs, whole milk, vegetable oil, and vanilla extract until thoroughly combined. This blend introduces richness and moisture that will complement the dry mix beautifully.
Step 4: Combine Wet and Dry Mixtures
Pour the wet ingredients over the dry ones and whisk until you get a smooth batter with no lumps. A well-mixed batter translates to cakes that rise evenly with a tender texture.
Step 5: Fill Pans and Bake
Spoon the batter into the prepared Twinkie pans, filling each cavity about two-thirds full. Bake the cakes for 15 to 20 minutes, or until a toothpick inserted in the center comes out clean. Watch the cakes carefully to avoid overbaking, as you want them moist and fluffy.
Step 6: Cool the Cakes
Once baked, remove the cakes from the oven and allow them to cool completely in the pans before attempting to remove and fill. This cooling stage is crucial so the cakes hold their shape while you fill them.
Step 7: Whip the Egg Whites for Filling
For the luscious filling, use an electric mixer fitted with a whisk attachment to beat the 2 egg whites on high speed until stiff peaks form. This fluffy base will become the soft, vanilla cream inside the cakes.
Step 8: Prepare Sugar Syrup
In a small saucepan, combine 135 grams of sugar and 40 millilitres of water. Stir over medium-low heat until the sugar dissolves, then increase to a medium-high and cook the syrup until it reaches 119°C–121°C (245°F–250°F). This precise temperature is vital for stabilizing the meringue filling.
Step 9: Incorporate Hot Syrup into Egg Whites
With your mixer running at medium-high, slowly pour the hot syrup into the whipped egg whites. Continue beating on high until the meringue cools to room temperature and turns thick and glossy. This meringue-based filling delivers that signature light yet creamy texture.
Step 10: Fill the Cakes
Fill a piping bag fitted with a #10 round tip with the vanilla meringue. Turn the cooled cakes over, insert the piping tip into three evenly spaced points on the base of each cake, and gently pipe filling into the center and both ends. Be careful not to overfill as you want a perfect balance of cake and cream.
How to Serve Homemade Twinkies Vanilla Cakes Recipe
Garnishes
A dusting of powdered sugar is a classic and simple way to dress up your Homemade Twinkies Vanilla Cakes Recipe. For a bit of extra flair, try sprinkling finely chopped toasted almonds or a light drizzle of melted chocolate over the top to add color and texture contrast.
Side Dishes
These cakes pair wonderfully with a cup of freshly brewed coffee or tea, making them a fantastic choice for afternoon treats or brunch sweeteners. For a lighter complement, serve alongside fresh berries or a simple fruit salad to cut through the sweetness.
Creative Ways to Present
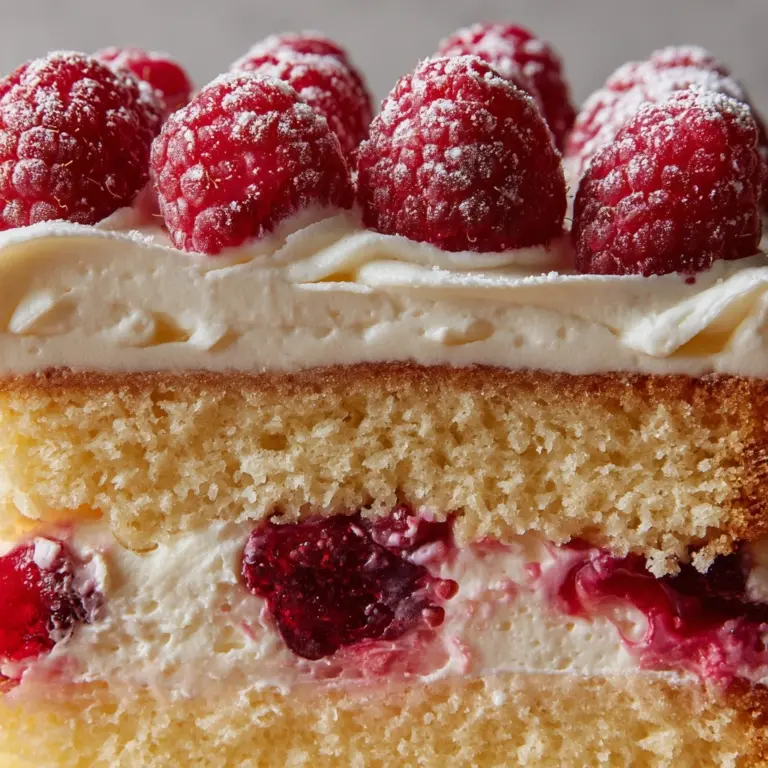
If you’re hosting a party, arrange your Homemade Twinkies Vanilla Cakes Recipe on a vintage cake stand or tiered tray to create a nostalgic dessert vignette. Cut some cakes in half horizontally to show off the creamy filling clearly, or serve them with a small dollop of whipped cream and a raspberry for an elegant touch.
Make Ahead and Storage
Storing Leftovers
Once filled, store your Homemade Twinkies Vanilla Cakes Recipe in an airtight container in the refrigerator. They should stay fresh and soft for up to three days. This makes them ideal for preparing ahead for gatherings or simply indulging over a few days.
Freezing
To freeze, wrap individual cakes tightly in plastic wrap and place them in a freezer-safe bag or container. They can be frozen for up to one month. Thaw them in the refrigerator overnight for best texture and flavor.
Reheating
Because these cakes have a delicate filling, reheating is best avoided. Instead, enjoy them chilled just as they are so the filling maintains its light and airy quality. If you prefer, let refrigerated cakes sit at room temperature for 15 minutes before serving to soften slightly.
FAQs
Can I use all-purpose flour instead of cake flour?
While you can substitute all-purpose flour, cake flour is preferred for its lower protein content which creates a lighter, softer crumb that is signature to Twinkies. If using all-purpose flour, try replacing a small portion with cornstarch to mimic cake flour.
Is the filling similar to marshmallow cream?
Yes, the filling is a Swiss meringue-style cream which is very light, sweet, and fluffy, somewhat similar to marshmallow cream but silkier and less sticky. It provides that perfect softness inside the moist cake.
Do I need special Twinkie-shaped pans?
To get the classic Twinkie shape, special pans work best. However, if you don’t have them, mini loaf pans or muffin tins can be used—though the presentation will be different, the taste remains delicious.
Can I make these cakes chocolate flavored?
Absolutely! You can add cocoa powder to the batter or incorporate melted chocolate for a fun twist. Adjust sugar slightly when adding cocoa to keep the balance right. Chocolate Twinkies are a fantastic variation to explore.
How long do these Homemade Twinkies Vanilla Cakes Recipe last?
When stored properly in an airtight container in the fridge, they last about three days. For the freshest taste and texture, enjoy them within this timeframe.
Final Thoughts
Making your own Twinkies might sound like a big project, but the Homemade Twinkies Vanilla Cakes Recipe shows it’s an approachable, rewarding adventure that brings a little joy and sweetness to your kitchen. Once you taste that tender cake with the luscious, airy filling, you’ll understand why this recipe becomes a cherished favorite. So grab your Twinkie pans and give it a try—you’re going to love sharing these homemade delights with friends and family.
Print
Homemade Twinkies Vanilla Cakes Recipe
- Prep Time: 30 minutes
- Cook Time: 30 minutes
- Total Time: 1 hour
- Yield: 14 Twinkie-shaped filled cakes
- Category: Dessert
- Method: Baking
- Cuisine: American
Description
These homemade Twinkies vanilla cakes are a delightful treat, featuring soft, airy cake shells filled with a luscious vanilla meringue cream. Perfect for recreating the nostalgic snack at home, this recipe guides you through making the fluffy cake batter and the sweet, glossy filling for an authentic taste and texture.
Ingredients
For the Cake:
- 250 grams cake flour, sifted
- 225 grams granulated sugar
- 2 teaspoons baking powder
- 1 teaspoon salt
- 6 large eggs, room temperature
- 120 millilitres whole milk
- 160 millilitres vegetable oil
- 1 tablespoon vanilla extract
For the Filling:
- 2 large egg whites, room temperature
- 135 grams granulated sugar
- 40 millilitres water
Instructions
- Preheat Oven and Prepare Pans: Preheat your oven to 177°C (350°F). Generously spray Twinkie-shaped cake pans with non-stick baking spray to ensure easy release of the cakes.
- Mix Dry Ingredients: In a large bowl, whisk together the sifted cake flour, sugar, baking powder, and salt until evenly combined, providing a well-mixed base for your batter.
- Combine Wet Ingredients: In a separate bowl, whisk the eggs, whole milk, vegetable oil, and vanilla extract thoroughly to blend all liquids smoothly.
- Blend Batter: Pour the wet mixture over the dry ingredients and whisk until the batter is smooth and free of lumps, creating a light and airy batter perfect for baking.
- Fill Pans and Bake: Spoon the batter into the prepared pans, filling each cavity about two-thirds full. Bake for 15–20 minutes or until a toothpick inserted into the center comes out clean, signaling the cakes are perfectly baked.
- Cool Cakes: Remove the cakes from the oven and allow them to cool completely in the pans before removing; this prevents breaking and prepares them for filling.
- Prepare Meringue Filling: Using an electric mixer with a whisk attachment, beat the egg whites on high speed until stiff peaks form, creating the base for your creamy filling.
- Make Sugar Syrup: In a small saucepan, combine the sugar and water. Stir over medium-low heat until the sugar dissolves. Then increase the heat to bring the syrup to 119°C–121°C (245°F–250°F), essential for the perfect meringue texture.
- Combine Syrup and Egg Whites: With the mixer running on medium-high speed, slowly pour the hot syrup into the whipped egg whites. Continue beating on high until the meringue cools to room temperature and becomes thick and glossy.
- Fill Cakes: Fill a piping bag fitted with a #10 round tip with the prepared meringue. Turn the cooled cakes over and insert the tip into three evenly spaced points on the base of each cake. Pipe filling into the center and both ends, taking care not to overfill.
Notes
- Use room temperature eggs for better emulsification and fluffier cake texture.
- Ensure the sugar syrup reaches the correct temperature for safe and stable meringue consistency.
- If Twinkie-shaped pans are unavailable, use a similarly shaped small cake or loaf pans, adjusting baking time as needed.
- Do not overfill the cakes with meringue to prevent leakage during serving.
- Store filled Twinkies in an airtight container in the refrigerator and consume within 2-3 days for optimal freshness.
