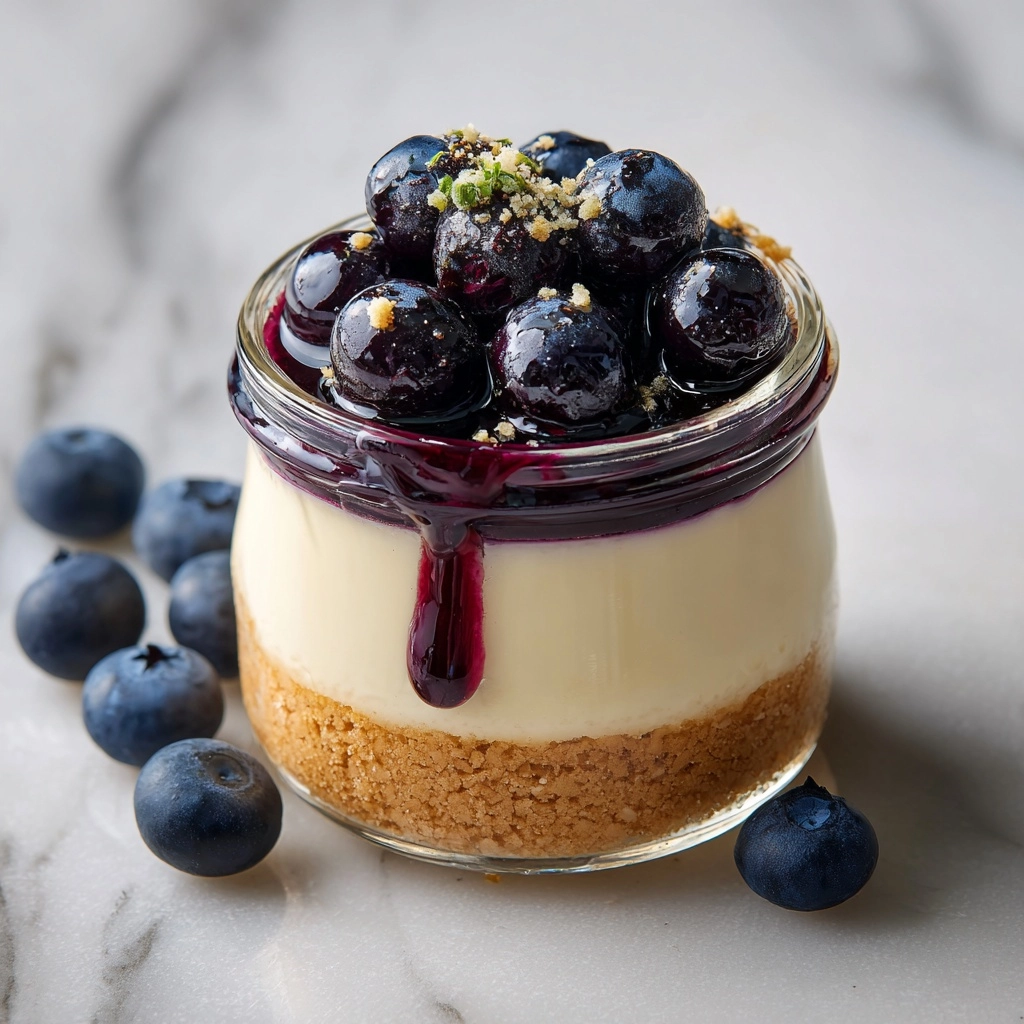
Get ready to meet your new favorite no-bake treat: High Protein Cheesecake Jars. These jars bring together all the creamy, tangy goodness you love in a classic cheesecake, but with a nourishing twist—each single-serve jar is packed with protein from Greek yogurt and protein powder. They’re vibrant, easy to whip up ahead of time, and perfect for everything from breakfast to dessert. Whether you’re chasing a sweet tooth or looking for a healthy meal-prep snack, these jars are proof that you never have to sacrifice flavor for nutrition.
Ingredients You’ll Need
You only need a handful of everyday ingredients to create something incredibly special. Each one pulls its own weight—building the perfect, creamy cheesecake filling, a buttery, crunchy crust, and a fresh berry crown on top. Here’s what makes each component shine.
- Plain Nonfat Greek Yogurt: High in protein and tang, it keeps the filling light but satisfying.
- Reduced-Fat Cream Cheese (softened): Adds classic cheesecake richness while keeping things lighter.
- Vanilla Protein Powder: Amp up those macros and infuse subtle sweetness—pick vanilla or unflavored for best results.
- Honey or Maple Syrup: Natural sweetness that balances the tang of the yogurt and cream cheese.
- Vanilla Extract: Deepens the dessert-like flavor of every bite.
- Crushed Graham Crackers: The crumbly, nostalgic base that brings big cheesecake energy.
- Melted Coconut Oil: Holds the crust together and adds a delicate hint of coconut.
- Pinch of Salt: Enhances all the flavors and keeps things from tasting flat.
- Fresh Berries (strawberries, blueberries, raspberries): Adds juicy contrast and beautiful pops of color.
- Optional Toppings (extra berries or granola): Layer on for texture and visual flair.
How to Make High Protein Cheesecake Jars
Step 1: Create the Graham Cracker Crust
Start by stirring together the crushed graham crackers, melted coconut oil, and a tiny pinch of salt in a small bowl. You’re looking for the texture of damp sand—it should hold together when pinched. This simple, no-bake base is the heartbeat of High Protein Cheesecake Jars, adding just enough buttery crunch in every bite. Divide the mixture between four small jars, pressing down lightly to form a satisfying crust layer.
Step 2: Whip Up the Creamy Cheesecake Filling
In a medium bowl, use a hand mixer or a sturdy whisk to beat the softened reduced-fat cream cheese until it’s smooth and lump-free. Add the Greek yogurt, vanilla protein powder, honey or maple syrup, and vanilla extract. Continue mixing until everything melds into one luxuriously creamy, ultra-smooth filling. This is where all the protein power and dreamy cheesecake flavor comes together!
Step 3: Assemble the Jars
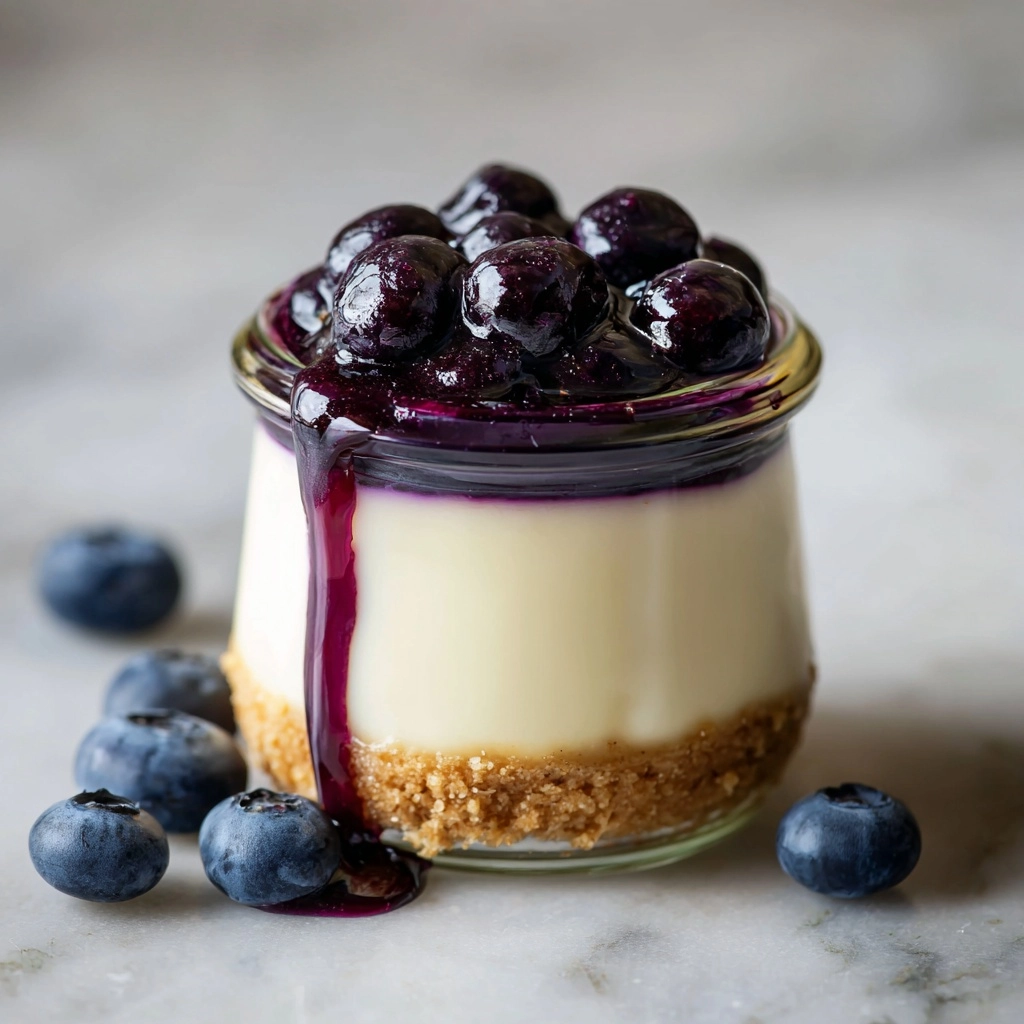
Dollop the cheesecake filling over the prepared crusts in your jars, dividing it evenly. With a spoon or small offset spatula, smooth the tops for that picture-perfect finish. Building these layers is almost as fun as eating them—each jar looks like a mini dessert masterpiece. High Protein Cheesecake Jars are meant to be stacked with flavor!
Step 4: Top with Fresh Berries
Scatter fresh berries over the creamy surface of each jar. Choose your favorites or go for a colorful mix. The berries add brightness, juiciness, and a hint of natural tartness that cuts through the richness in the best possible way.
Step 5: Chill and Set
Finally, refrigerate your jars for at least one hour. This time allows the crust to firm up and the filling to set comfortably, making for a cheesecake experience that holds its shape—and only gets tastier as it waits for you in the fridge.
How to Serve High Protein Cheesecake Jars
Garnishes
A little garnish goes a long way! Add an extra flourish of fresh berries, a scattering of granola for crunch, or a few mint leaves for color and fragrance. Whether you like your High Protein Cheesecake Jars rustic or fancy, these finishing touches make each serving feel completely special.
Side Dishes
While these jars are delicious all on their own, they shine alongside a fruit salad, a serving of lightly toasted nuts, or a steamy mug of coffee or tea. They’re also just right on a brunch spread where sweet meets savory, adding balance to any meal.
Creative Ways to Present
Try layering the ingredients in clear glasses or mini trifle bowls for a showy presentation, or stack them neatly in mason jars for the ultimate grab-and-go snack. If you’re entertaining, set out a toppings bar so everyone can build their own High Protein Cheesecake Jar creation!
Make Ahead and Storage
Storing Leftovers
High Protein Cheesecake Jars store beautifully in the fridge for up to four days. Simply screw on the lids (or cover tightly with plastic wrap) and keep them chilled until you’re ready to enjoy. They make for the best meal prep snack, staying creamy and fresh day after day.
Freezing
You can freeze assembled jars (with lids) for up to one month, though be aware that the texture of the filling may soften slightly upon thawing. For best results, freeze without fresh berries, then add your toppings after they’ve thawed overnight in the refrigerator.
Reheating
No need for reheating—these are made to be enjoyed straight from the fridge! If you do freeze your jars, let them thaw in the refrigerator until chilled and creamy again before diving in.
FAQs
Can I use a different flavor of protein powder?
Absolutely! While vanilla or unflavored protein powder gives you a classic cheesecake flavor, feel free to experiment. Chocolate, strawberry, or even spiced protein powders can bring bold new flavors to these High Protein Cheesecake Jars.
Can I make these High Protein Cheesecake Jars dairy-free?
Yes, you can easily swap in your favorite plant-based yogurt, cream cheese, and protein powder—just make sure they’re unsweetened to control the final flavor.
How do I prevent the crust from getting soggy?
Mixing the crust well and pressing it down firmly helps prevent sogginess. Additionally, chilling the crust before adding the filling creates a little barrier, so the crust retains its crumbly character in the finished jars.
What are the best jars to use?
Any small mason jars or glass containers with tight-fitting lids work well. Look for 6 to 8-ounce jars for the perfect single-serve portion of High Protein Cheesecake Jars.
Can I double or triple the recipe?
Definitely! This recipe scales up beautifully—just multiply the ingredient amounts, line up your jars, and follow the same steps. Great for parties or when you want meal prep to last all week.
Final Thoughts
If you’re looking for a dessert (or snack!) that’s both satisfying and nourishing, you absolutely have to try High Protein Cheesecake Jars. They’re easy, endlessly customizable, and guaranteed to hit the spot every single time—so grab those jars and welcome your new kitchen favorite!