
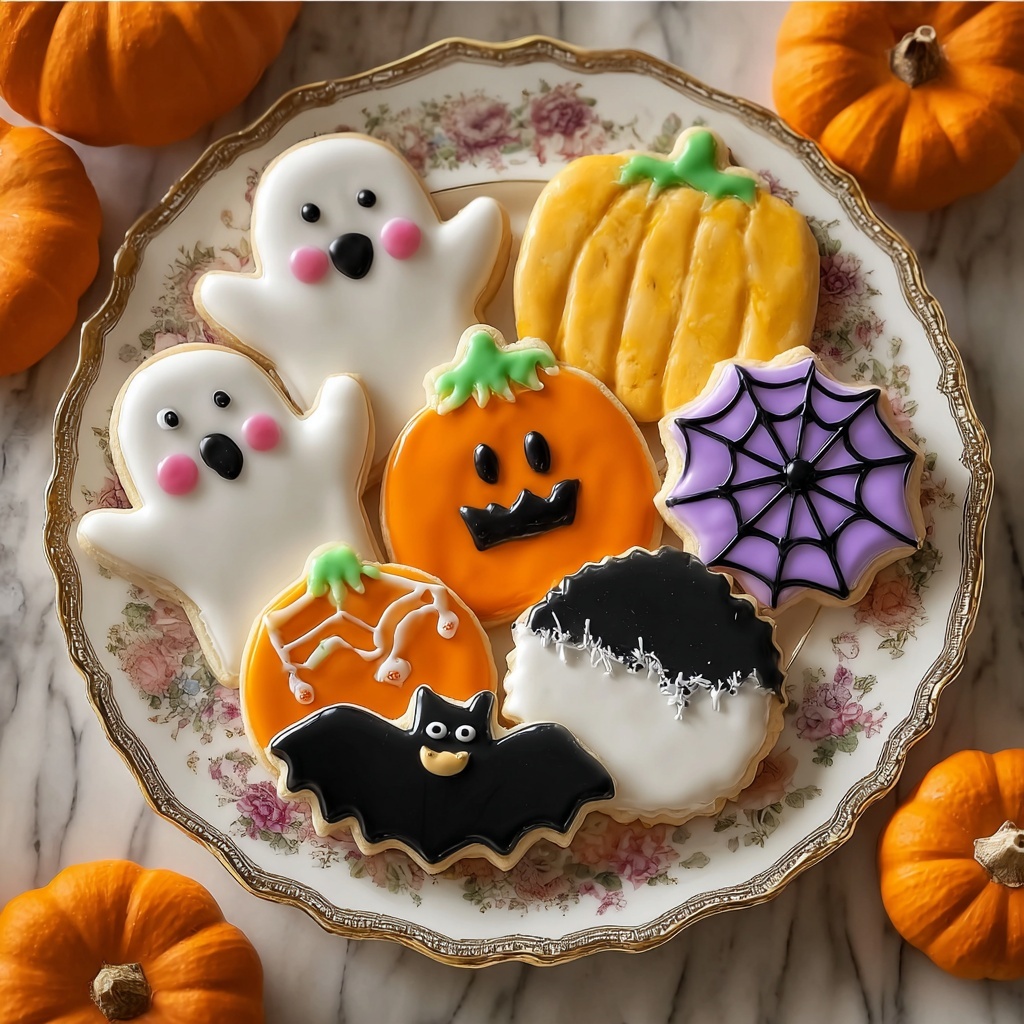
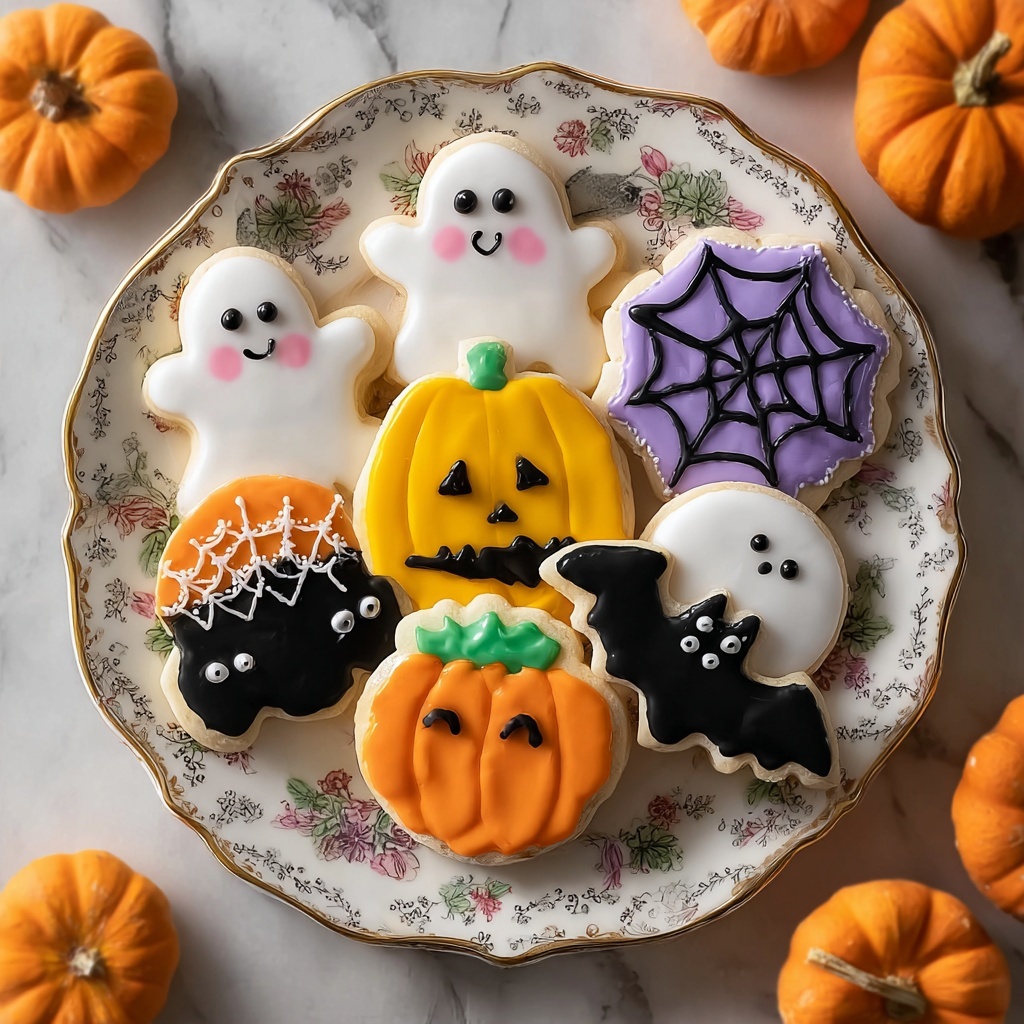
If you’re looking to add a magical touch to your Halloween celebrations, this Halloween Royal Icing Cookies Recipe is an absolute must-try. These buttery, soft cookies decorated with vibrant, smooth royal icing bring together the perfect balance of flavors and festive flair. Whether you’re hosting a party or wanting to delight your family, these cookies make every bite feel like a sweet celebration. The recipe is straightforward but impressive, allowing you to create a colorful spread of spooky shapes that taste as amazing as they look.
Ingredients You’ll Need
This recipe relies on simple, pantry-friendly ingredients that work harmoniously to give your cookies a perfect texture and a gorgeous finish. Each component plays a crucial role—flour gives structure, butter brings richness, and the royal icing adds that stunning decorative touch that everyone will admire.
- 3 cups all-purpose flour: The base that provides a tender yet sturdy cookie foundation perfect for decorating.
- 1 teaspoon baking powder: Helps your cookies rise just enough to stay soft without spreading too thin.
- 1/2 teaspoon salt: Balances the sweetness and enhances all the flavors beautifully.
- 1 cup unsalted butter, softened: Contributes buttery richness and keeps the texture melt-in-your-mouth.
- 1 cup granulated sugar: Adds sweetness and helps create a light, fluffy dough when creamed with butter.
- 1 large egg: Binds the dough ingredients together and ensures a tender crumb.
- 1 teaspoon vanilla extract: Essential for that warm, classic flavor we all love in cookies.
- 1/2 teaspoon almond extract: A subtle twist that elevates the cookie’s flavor, giving it a delicate nutty note.
- Assorted food coloring gels: Bring your Halloween themes to life with vibrant, vivid icing colors.
- Royal Icing Ingredients:
- 4 cups powdered sugar: Creates a smooth, sweet canvas perfect for piping detailed designs.
- 3 tablespoons meringue powder: Gives the icing strength and structure, helping it harden perfectly.
- 6 tablespoons warm water: Adjusts the icing to just the right consistency for decorating.
How to Make Halloween Royal Icing Cookies Recipe
Step 1: Prepare Your Dry Ingredients
Start by whisking together the flour, baking powder, and salt in a large bowl. This ensures your dry ingredients are evenly mixed and ready to combine with the wet ingredients to create a smooth dough.
Step 2: Cream Butter and Sugar
In another bowl, use an electric mixer to cream the softened butter and sugar together until the mixture is light and fluffy, about 2 to 3 minutes. This step is key to a tender cookie with a lovely texture.
Step 3: Add the Egg and Extracts
Beat in the egg, vanilla extract, and almond extract until everything is well combined. These flavors add a special touch that elevates your cookies beyond the ordinary.
Step 4: Combine Wet and Dry Mixtures
Gradually add the dry mixture into the wet, mixing gently on low speed to bring the dough together. Avoid overmixing to keep the texture light and tender.
Step 5: Chill the Dough
Divide the dough into two portions, wrap each in plastic wrap, and refrigerate for at least one hour. This chilling step makes the dough easier to roll and ensures your cookies keep their shape when baked.
Step 6: Preheat and Prepare Baking Sheets
Preheat your oven to 350°F (180°C) and line your baking sheets with parchment paper. Proper preparation here means your cookies won’t stick and will bake evenly.
Step 7: Roll and Cut the Dough
On a floured surface, roll the dough out to about 1/4-inch thickness. Use your favorite Halloween-themed cookie cutters to create whimsical shapes like pumpkins, bats, and ghosts—this is where the fun really begins!
Step 8: Bake the Cookies
Arrange your cutouts on the baking sheets, leaving enough space between each to prevent sticking. Bake for 8 to 10 minutes until the edges turn lightly golden—watch closely, as they bake quickly.
Step 9: Cool Completely
Allow your cookies to cool fully on a wire rack before any decorating to ensure the royal icing sets properly and doesn’t melt or slide off.
Step 10: Prepare the Royal Icing
Beat the powdered sugar, meringue powder, and warm water using an electric mixer, starting on low then increasing to high speed for 5 to 7 minutes until stiff peaks form. This fluffy yet sturdy icing is perfect for keeping your designs crisp.
Step 11: Color Your Icing
Divide the icing into separate bowls and add gel food coloring to create an array of festive colors. The gel variety keeps the icing thick and vibrant, ideal for detailed decorating.
Step 12: Decorate Your Cookies
Using piping bags fitted with small tips, decorate your cooled cookies with your colorful royal icing. Take your time and get creative—you can try outlines, flood fills, and even delicate patterns. Let the icing set completely before handling or serving.
How to Serve Halloween Royal Icing Cookies Recipe
Garnishes
Though the royal icing already brings fabulous color, adding edible glitter or small candy accents can make your cookies pop even more. These little touches add sparkle and give a professional look that’s perfect for holiday gatherings.
Side Dishes
These cookies pair amazingly well with a warm beverage like spiced apple cider or a creamy pumpkin latte. The sweetness of the cookies complemented by cozy drinks enhances the festive mood and keeps everyone coming back for more.
Creative Ways to Present
Try arranging your cookies on tiered platters or in themed boxes for gift-giving. Another enchanting idea is placing them in a Halloween-themed cookie jar or wrapping individually with clear bags tied with festive ribbons to hand out to trick-or-treaters or party guests.
Make Ahead and Storage
Storing Leftovers
Store your decorated cookies in an airtight container at room temperature to keep them fresh for up to a week. Layer them with parchment paper to prevent sticking and preserve the beautiful icing designs.
Freezing
You can freeze undecorated cookies by wrapping them tightly in plastic wrap and placing them in freezer bags. Thaw them completely before adding royal icing to avoid condensation ruining your decorations.
Reheating
Since these cookies are best enjoyed fresh or at room temperature, avoid reheating after decorating. Simply let them come to room temperature if chilled, and enjoy their soft, buttery goodness with perfect icing.
FAQs
Can I make the dough without almond extract?
Absolutely! The almond extract adds a delightful note, but if you or your guests have allergies or don’t prefer it, simply omit it. The cookies will still be delicious with the vanilla alone.
How long does royal icing take to dry?
Royal icing typically needs at least 4 to 6 hours to dry completely, but for best results, leave it overnight. This ensures a hard, smooth finish that won’t smudge or melt during handling.
Can I use regular food coloring instead of gel?
Gel food coloring is recommended for royal icing because it is more concentrated and won’t thin the icing. Using liquid food coloring can make your icing too runny, which makes decorating harder and less precise.
What can I do if my dough is too sticky?
If your dough feels too sticky to roll out, sprinkle a little flour on your work surface and hands. You can also chill the dough for a bit longer to firm it up and make handling easier.
Is it okay to double the recipe?
Yes! This Halloween Royal Icing Cookies Recipe scales up very well. Just be sure to mix dough and icing in batches large enough to handle easily to maintain consistent texture and color.
Final Thoughts
Creating these charming Halloween royal icing cookies is not just baking—it’s a way to bring joy, color, and a personal touch to your holiday festivities. Whether you’re decorating with kids or crafting an exquisite spread for friends, this Halloween Royal Icing Cookies Recipe promises smiles, sweet memories, and treats that look too good to eat—though deliciousness usually wins out. Give it a try and watch your Halloween celebrations come alive with every beautifully iced bite!
Print
Halloween Royal Icing Cookies Recipe
- Prep Time: 0h 30m
- Cook Time: 0h 10m
- Total Time: 1h 40m
- Yield: About 24 medium-sized cookies
- Category: Dessert
- Method: Baking
- Cuisine: American
Description
Celebrate Halloween with these delightful Halloween Royal Icing Cookies. Soft, buttery sugar cookies are perfectly baked and decorated with colorful, festive royal icing. The recipe includes a homemade royal icing that’s easy to pipe and dries to a smooth, hard finish, making these cookies ideal for fun and creative Halloween decorations.
Ingredients
Cookie Dough
- 3 cups all-purpose flour
- 1 teaspoon baking powder
- 1/2 teaspoon salt
- 1 cup unsalted butter, softened
- 1 cup granulated sugar
- 1 large egg
- 1 teaspoon vanilla extract
- 1/2 teaspoon almond extract
- Assorted food coloring gels (for decorating)
Royal Icing
- 4 cups powdered sugar
- 3 tablespoons meringue powder
- 6 tablespoons warm water
- Gel food coloring as desired
Instructions
- Mix Dry Ingredients: In a large bowl, whisk together the all-purpose flour, baking powder, and salt. Set aside for later.
- Cream Butter and Sugar: Using an electric mixer, beat the softened butter and granulated sugar together until light and fluffy, about 2-3 minutes. This step helps create a tender, airy texture in the cookies.
- Add Egg and Extracts: Beat in the egg, vanilla extract, and almond extract until the mixture is smooth and fully combined, adding moisture and flavor to your dough.
- Combine Dry and Wet Ingredients: Gradually add the dry mixture to the wet ingredients, mixing on low speed until a soft dough forms. Avoid overmixing to keep cookies tender.
- Chill Dough: Divide the dough into two portions, wrap each tightly in plastic wrap, and refrigerate for at least 1 hour. Chilling firms the dough, making it easier to roll out and cut shapes.
- Preheat Oven and Prepare Baking Sheets: Preheat your oven to 350°F (180°C). Line baking sheets with parchment paper to prevent sticking.
- Roll and Cut Dough: On a floured surface, roll the chilled dough to about 1/4-inch thickness. Use Halloween-themed cookie cutters to cut out shapes for a festive twist.
- Arrange Cookies on Sheets: Place cookie shapes on the prepared baking sheets, leaving some space between each to allow for slight spreading during baking.
- Bake Cookies: Bake for 8-10 minutes until the edges just start to turn golden. This ensures a soft cookie with a slightly crisp edge. Remove and cool completely on a wire rack to prevent sogginess.
- Prepare Royal Icing: In a bowl, beat the powdered sugar, meringue powder, and warm water together. Start mixing on low speed, then increase to high for 5-7 minutes until the icing forms stiff peaks, indicating proper consistency for piping.
- Color the Icing: Divide the royal icing into separate bowls and add gel food coloring as desired for vibrant decorations.
- Decorate Cookies: Using piping bags fitted with small tips, decorate the cooled cookies with the colored icing. Allow the icing to dry completely before serving to ensure designs keep their shape.
Notes
- Make sure to chill the dough sufficiently; this helps prevent excessive spreading when baking.
- If the royal icing becomes too thick, add a teaspoon of warm water at a time to reach desired consistency.
- Use gel food coloring instead of liquid to avoid thinning out the icing.
- Store decorated cookies in an airtight container at room temperature for up to one week.
- For more vibrant colors, let the decorated cookies dry overnight.


