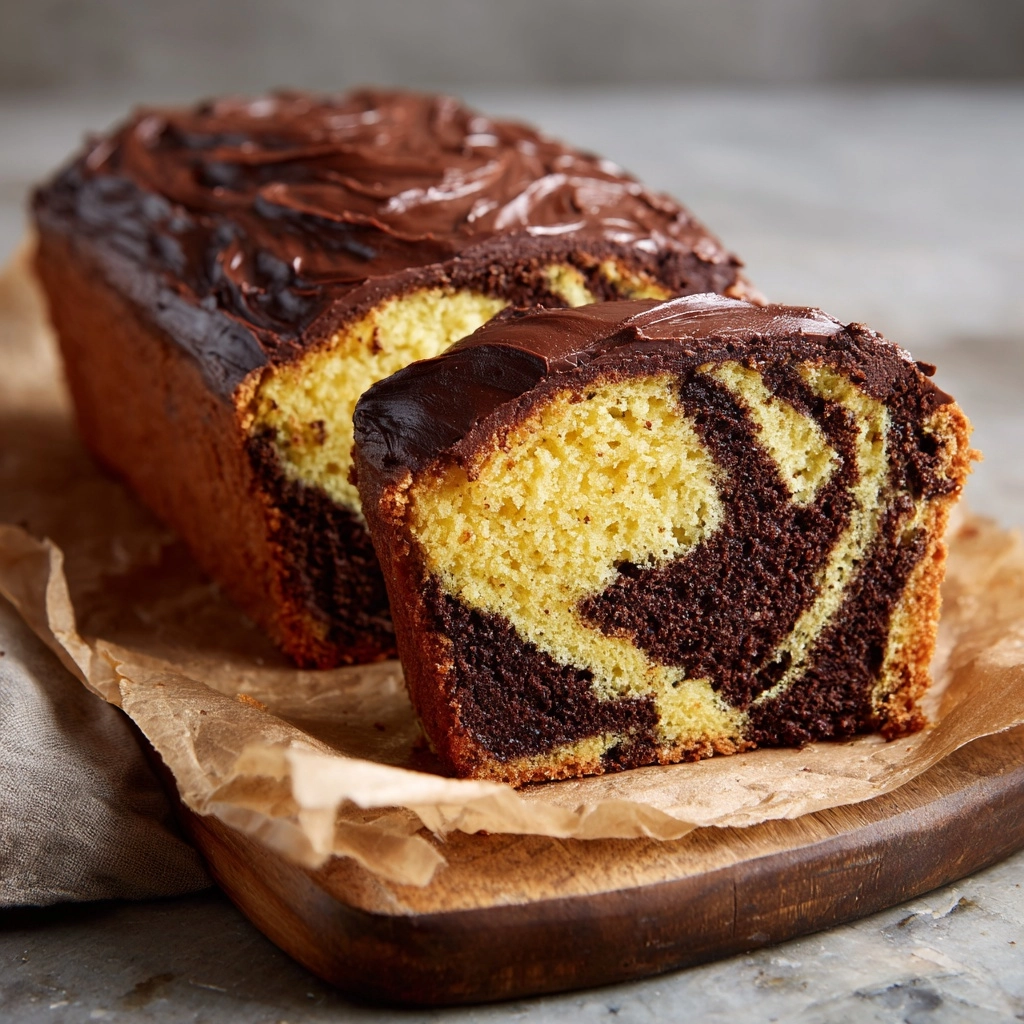
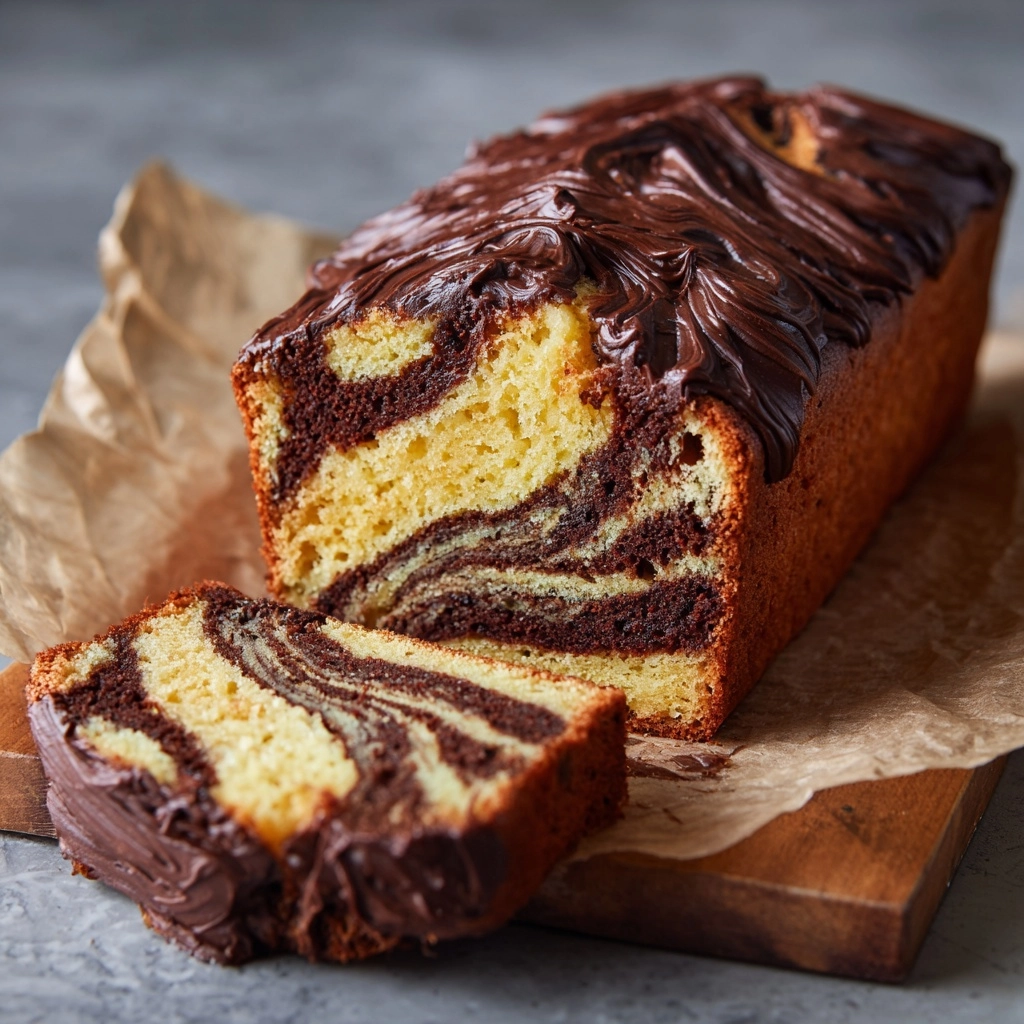
Get ready for a slice of something truly special: the Espresso Marbled Loaf Cake. This stunning dessert fuses rich coffee flavor, tender vanilla cake, and a striking swirl of chocolate and espresso in every slice. It’s the kind of homemade marvel that’s perfect for a leisurely weekend breakfast, a mid-afternoon pick-me-up, or an impromptu gathering where you want to wow without stress. Prepare to fall in love with its gorgeous marbled design and soft crumb, all brought together by the magical pairing of cocoa and espresso. Trust me, this cake will quickly become a staple in your kitchen!
Ingredients You’ll Need
What I adore about this recipe is how approachable the ingredient list is—just a handful of pantry staples coaxed into something extraordinary. Each ingredient has a job, from lending irresistible softness to building those unforgettable flavors and visual swirls. Let’s break it down so you know exactly why every element matters.
- All-purpose flour: The trusty backbone for structure and a close yet airy crumb.
- Baking powder: Lifts the loaf as it bakes, ensuring a perfect rise and lightness.
- Salt: Just a touch sharpens the flavors and balances sweetness.
- Unsalted butter (softened): Adds rich, creamy flavor and incredible tenderness.
- Granulated sugar: Sweetness, yes, but also essential for moisture and that melt-in-your-mouth crumb.
- Large eggs: Bind everything together while contributing moistness and structure.
- Whole milk: The fat and liquid work to soften the batter, creating an indulgent texture.
- Vanilla extract: Provides warmth, depth, and those signature cake notes.
- Instant espresso powder (dissolved in hot water): Brings that robust coffee punch—absolutely essential for a true espresso marbled cake!
- Unsweetened cocoa powder: Deepens the espresso’s flavor and provides that iconic, beautiful swirl.
How to Make Espresso Marbled Loaf Cake
Step 1: Prep Your Pan and Ingredients
Begin by setting yourself up for success: preheat your oven to 350°F and grease a 9×5-inch loaf pan. This ensures a golden, even bake and makes releasing the loaf a breeze. Take a moment to let your butter come to room temperature—it’ll make the creaming process a dream!
Step 2: Whisk the Dry Ingredients
In a medium bowl, whisk together all-purpose flour, baking powder, and salt. This simple step ensures that all those leaveners and seasonings are evenly distributed, so you’ll get the best lift and consistent flavor in every bite.
Step 3: Cream the Butter and Sugar
Use a large bowl and an electric mixer to beat your softened butter with the granulated sugar until light and fluffy—think pale, creamy, and irresistible. This step is crucial, as it whips air into the mix that helps form the cake’s soft crumb.
Step 4: Add Eggs and Vanilla
Crack in the eggs one at a time, mixing well after each addition. Don’t rush—giving the eggs time to combine makes for a better batter! Finish it off by adding in your vanilla extract for that unmistakably cozy flavor.
Step 5: Alternate Wet and Dry Ingredients
Switch to low speed and add your dry mixture in thirds, alternating each addition with half the milk. Always start and finish with the dry ingredients, which keeps the batter smooth and prevents over-mixing. You’ll end up with a thick, silky batter ready to be marbled!
Step 6: Create the Espresso Swirl
Divide the batter between two bowls. To one bowl, stir in the dissolved espresso powder and cocoa powder until perfectly incorporated. Now you have both vanilla and espresso batters, each smooth and fragrant.
Step 7: Marble and Bake the Loaf
Drop alternating spoonfuls of vanilla and espresso batter into your prepared pan, then gently swirl them together with a butter knife for that beautiful marbled pattern. Pop it in the oven for 50 to 60 minutes—your kitchen will smell heavenly! The cake is done when a toothpick inserted in the center comes out clean.
Step 8: Cool and Unmold
Once baked, let the Espresso Marbled Loaf Cake cool in its pan for about 10 minutes—not too long, lest it stick. Transfer to a wire rack to finish cooling completely. This keeps the crust crisp and crumb light, perfect for slicing!
How to Serve Espresso Marbled Loaf Cake

Garnishes
To really make your slices sing, dust the loaf with a light sprinkle of powdered sugar or try a drizzle of simple icing. Chocolate curls or chocolate-covered espresso beans are decadently delicious if you want to lean into the coffeehouse vibe. A dollop of softly whipped cream on the side turns it into pure elegance.
Side Dishes
This cake pairs beautifully with a silky latte, hot espresso, or even a glass of cold milk. For brunch, serve it alongside juicy berries or a small bowl of Greek yogurt—the tang is a perfect flavor counterpoint. It’s a treat that plays well as a snack, dessert, or sweet finish.
Creative Ways to Present
For a fun, shareable moment, slice the Espresso Marbled Loaf Cake and fan the slices on a pretty platter, letting those swirl patterns shine. Or, try serving individual slices with a scoop of vanilla or coffee ice cream for a delightful dessert. You can even bake mini loaves for gifting—wrap them in parchment and twine for the cutest homemade present!
Make Ahead and Storage
Storing Leftovers
To keep your cake at its best, wrap it tightly in plastic wrap or foil and store at room temperature for up to three days. The flavors actually deepen overnight, making every leftover slice as dreamy as the first.
Freezing
Espresso Marbled Loaf Cake freezes like a charm! Wrap the cooled loaf or individual slices well and tuck them into a freezer bag. Freeze for up to three months. Just remember to label it so you know you have a treat waiting!
Reheating
If you like your cake a little warm (who could blame you?), pop a slice in the microwave for about 10 seconds or gently warm it in a low oven. This revives the cake’s tender texture and makes that espresso swirled aroma bloom all over again.
FAQs
Can I use regular brewed coffee instead of instant espresso powder?
For the boldest coffee flavor, instant espresso powder is best, as it’s more concentrated and blends seamlessly into the batter. If you use brewed coffee, you’d need much more liquid to reach similar strength, which could alter the loaf’s texture.
Is it possible to make this recipe dairy-free?
Absolutely! Swap the butter for a dairy-free margarine or coconut oil, and substitute whole milk with your favorite plant-based milk. The result will still be delicious and beautifully marbled.
How do I prevent the batter from over-mixing?
Mix just until the last streaks of flour disappear when combining ingredients. Over-mixing can make the loaf tough, so a gentle hand keeps things tender.
Can I double the recipe for a crowd?
Yes! Simply double the ingredients and divide the batter between two loaf pans. Watch the bake time—you might need to add a couple of minutes, depending on your oven.
Is this Espresso Marbled Loaf Cake sweet enough to serve as dessert?
Absolutely—it’s sweet and rich enough to shine on a dessert table, but it’s also just right with coffee for breakfast or brunch. Its versatility might be my favorite feature!
Final Thoughts
If you love coffee, chocolate, and a show-stopping crumb, you owe it to yourself to bake this Espresso Marbled Loaf Cake. Share it with friends or savor quiet moments with a slice and your favorite drink. Once you see those beautiful swirls and taste that perfect espresso note, you’ll wonder how you lived without it.
Print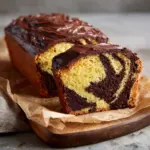
Espresso Marbled Loaf Cake Recipe
- Prep Time: 20 minutes
- Cook Time: 55 minutes
- Total Time: 1 hour 15 minutes
- Yield: 10 slices
- Category: Dessert
- Method: Baking
- Cuisine: American
- Diet: Vegetarian
Description
Indulge in the rich flavors of espresso and chocolate with this delightful Espresso Marbled Loaf Cake. Perfect for coffee lovers, this moist and tender loaf cake is easy to make and features a beautiful marbled design that’s as impressive as it is delicious.
Ingredients
Dry Ingredients:
- 1 3/4 cups all-purpose flour
- 1 1/2 teaspoons baking powder
- 1/2 teaspoon salt
Wet Ingredients:
- 1/2 cup unsalted butter (softened)
- 1 cup granulated sugar
- 2 large eggs
- 1/2 cup whole milk
- 1 teaspoon vanilla extract
- 1 tablespoon instant espresso powder dissolved in 1 tablespoon hot water
- 2 tablespoons unsweetened cocoa powder
Instructions
- Preheat the oven and prepare the pan: Preheat the oven to 350°F and grease a 9×5-inch loaf pan.
- Prepare the dry ingredients: In a medium bowl, whisk together the flour, baking powder, and salt.
- Prepare the wet ingredients: In a large bowl, beat the butter and sugar until light and fluffy. Add eggs one at a time, mixing well. Mix in vanilla.
- Combine wet and dry ingredients: Gradually add dry ingredients to wet ingredients, alternating with milk. Divide batter into two bowls.
- Add espresso and cocoa: To one bowl, stir in dissolved espresso and cocoa powder until combined.
- Assemble and bake: Spoon alternating batters into the pan, swirl with a knife, and bake for 50-60 minutes.
- Cool and serve: Cool in the pan for 10 minutes, then transfer to a wire rack to cool completely.
Notes
- For extra espresso flavor, add an additional teaspoon of espresso powder to the chocolate swirl.
- This loaf cake tastes even better the next day as the flavors meld together.
Nutrition
- Serving Size: 1 slice
- Calories: 280
- Sugar: 20g
- Sodium: 210mg
- Fat: 13g
- Saturated Fat: 8g
- Unsaturated Fat: 4g
- Trans Fat: 0g
- Carbohydrates: 36g
- Fiber: 1g
- Protein: 4g
- Cholesterol: 55mg
