
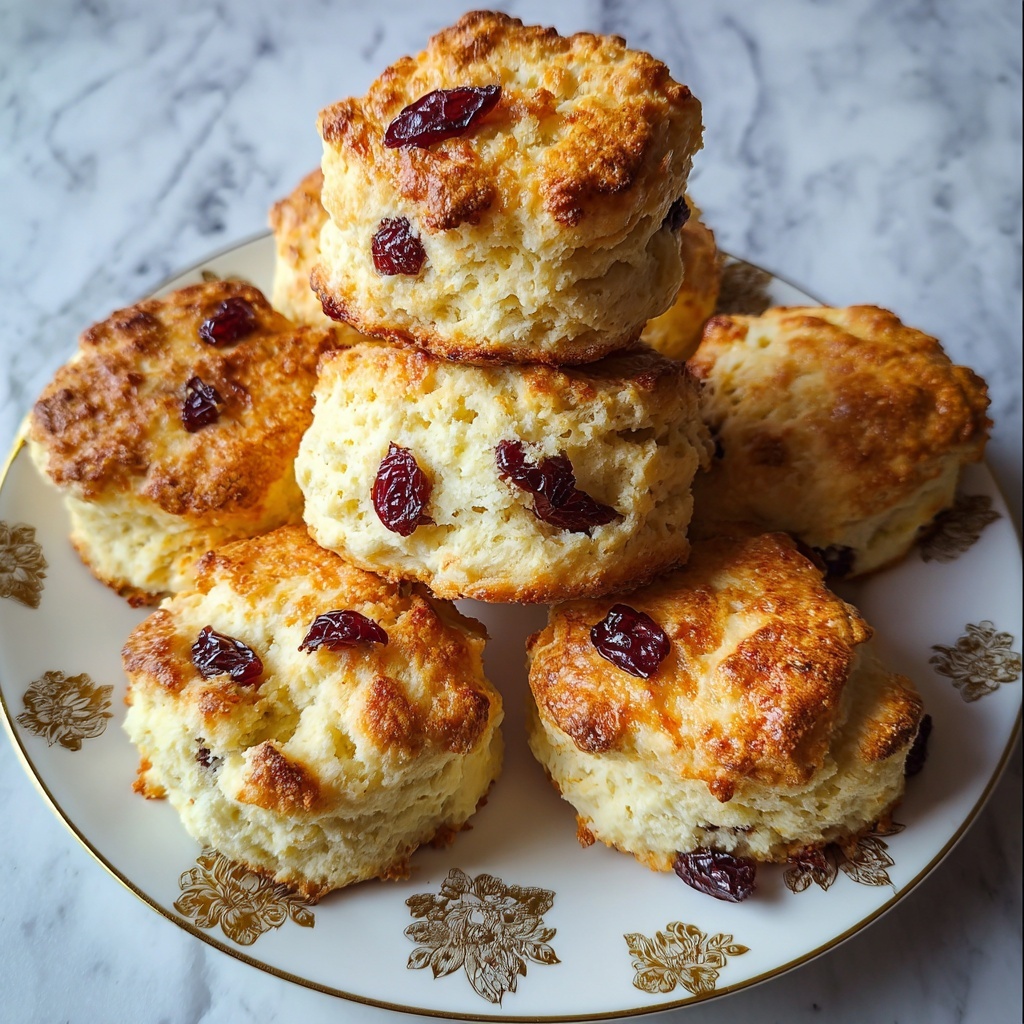
If you’ve been on the lookout for a quick and delightful treat that fits perfectly into a gluten-free lifestyle, then this Crispy Gluten-Free Air-Fryer Scones Recipe is about to become your new best friend. These scones come out golden and crunchy on the outside while staying tender and soft inside, all without the hassle of using an oven. With simple ingredients and an easy air-fryer method, you’ll be enjoying bakery-quality scones in less than 30 minutes. Trust me, once you try this recipe, you’ll wonder how you ever lived without it!

Ingredients You’ll Need
Keeping this Crispy Gluten-Free Air-Fryer Scones Recipe both accessible and scrumptious means using a handful of pantry staples. Each ingredient plays a vital role from creating the perfect texture to giving just the right hint of sweetness and flavor.
- Gluten-free all-purpose flour: The foundation of your scones, making sure they’re light yet sturdy without gluten.
- Baking powder: Helps the scones rise and become airy, giving that tender crumb you crave.
- Salt: Enhances all the flavors, balancing the sweetness beautifully.
- Granulated sugar: Adds a delicate sweetness that caramelizes during cooking for a hint of crispiness.
- Unsalted butter, cold and cubed: Creates flakiness and richness—cold butter is key for that crispy texture!
- Milk of choice: Binds the dough together and keeps it moist; feel free to use dairy or your favorite plant-based milk.
- Large egg: Adds structure and a soft crumb while enriching the dough.
- Vanilla extract: Brings a lovely warm aroma that complements the subtle sweetness perfectly.
- Dried fruits or chocolate chips (optional): For a fun twist, either add chewy bits of raisins or zingy cranberries or sweet chocolate chips for indulgence.
How to Make Crispy Gluten-Free Air-Fryer Scones Recipe
Step 1: Mix the Dry Ingredients
Start by whisking together the gluten-free flour, baking powder, salt, and sugar in a large bowl. This combines all your dry ingredients to evenly distribute the rising agent and seasoning, setting a great base for your scones.
Step 2: Cut in the Butter
Add the cold cubed butter to your flour mixture. Using a pastry cutter or your fingertips, blend it until the texture looks like coarse crumbs—this process creates flaky pockets once cooked, giving those satisfying layers.
Step 3: Combine Wet Ingredients
In a separate bowl, whisk together the milk, egg, and vanilla extract until smooth and well mixed. These add moisture, richness, and a wonderful flavor foundation.
Step 4: Bring it Together
Pour the wet mix over the dry ingredients and stir gently until just combined. Aim for a slightly sticky dough—overmixing can make scones tough, so treat them gently!
Step 5: Fold in Optional Treats
If you’re using dried fruits or chocolate chips, now’s the time to fold them in carefully so they’re evenly distributed without breaking the dough.
Step 6: Shape the Dough
Lightly dust your clean surface with gluten-free flour, turn out the dough, and pat into a circle about 1 inch thick. This shape ensures your scones cook evenly and look inviting.
Step 7: Cut Into Wedges
Using a sharp knife, slice the dough circle into 6 to 8 even wedges, perfect bite-sized portions that crisp up nicely in the air fryer.
Step 8: Preheat Your Air Fryer
Set your air fryer to 350°F (175°C) and let it heat up. This prepares the basket for baking your scones to a golden perfection.
Step 9: Prepare to Air-Fry
Place a piece of parchment paper in the air fryer basket and arrange the scone wedges on top, leaving some space around each one so the hot air can crisp all sides evenly.
Step 10: Air-Fry to Crispy Perfection
Cook the scones in the air fryer for 12-15 minutes. Keep an eye out for a gorgeous golden brown color as a signal that they’re perfectly done and irresistibly crispy.
Step 11: Cool and Enjoy
Remove the scones carefully and let them cool on a wire rack. This keeps them from steaming on the bottom and preserves that crisp crust as you get ready to dig in!
How to Serve Crispy Gluten-Free Air-Fryer Scones Recipe
Garnishes
A light dusting of powdered sugar, a drizzle of honey or maple syrup, or a dollop of whipped cream all add a delightful touch that enhances both appearance and flavor, making your scones feel extra special.
Side Dishes
Pair these scones with fresh berries, a small bowl of clotted cream or jam, or even alongside a hot cup of tea or coffee. These sides balance the richness and add refreshing or creamy contrasts.
Creative Ways to Present
Serve your scones stacked on a pretty platter or nestled in a basket lined with a cloth napkin. You can also slice them open and add cream cheese, nut butters, or lemon curd for an interactive snack experience that’s fun and delicious.
Make Ahead and Storage
Storing Leftovers
Leftover scones stay moist and tasty when kept in an airtight container at room temperature for up to 2 days. Keep them away from direct sunlight or heat to maintain their crisp exterior.
Freezing
To enjoy your Crispy Gluten-Free Air-Fryer Scones Recipe later, freeze fully cooled scones in a sealed freezer bag or container. They can last up to 3 months, perfect for a quick breakfast or snack anytime cravings hit.
Reheating
Reheat frozen or leftover scones in the air fryer at 320°F for 3-5 minutes until warm and crispy again. This method refreshes their texture far better than a microwave or oven.
FAQs
Can I use regular flour instead of gluten-free flour?
Yes, you can substitute with regular all-purpose flour if gluten isn’t a concern, but keep in mind the texture will be slightly different from the intended gluten-free crumb.
What type of air fryer works best for these scones?
Most countertop air fryers work wonderfully; just make sure your basket has enough space to arrange the wedges without crowding to get that perfect crisp.
Can I add other mix-ins to these scones?
Absolutely! Nuts, seeds, or even fresh herbs can add exciting flavors and textures to customize your scones to your liking.
Is it necessary to use cold butter?
Yes, cold butter is essential for creating the flaky texture that makes these scones so delightful. Warm butter will blend too much into the dough and yield a denser scone.
How long can I keep the dough before cooking?
You can refrigerate the dough for up to 24 hours before air frying. Just cover tightly with plastic wrap to prevent drying out.
Final Thoughts
I genuinely hope you give this Crispy Gluten-Free Air-Fryer Scones Recipe a try because it’s a game-changer for quick, delicious, and gluten-free baking. It’s the kind of recipe that makes mornings happier and snack times cozier, and once you make it, you’ll want to share it with everyone you know. Happy baking and even happier eating!
Print
Crispy Gluten-Free Air-Fryer Scones Recipe
- Prep Time: 15 minutes
- Cook Time: 15 minutes
- Total Time: 30 minutes
- Yield: 6 to 8 scones
- Category: Breakfast, Snack
- Method: Air Frying
- Cuisine: American
- Diet: Gluten Free
Description
These Crispy Gluten-Free Air-Fryer Scones are a delightful treat, perfectly golden and tender on the inside with a crisp exterior. Made with gluten-free flour and customizable with your choice of dried fruits or chocolate chips, these scones are quick to prepare and baked effortlessly in the air fryer, making them an ideal snack or breakfast pastry for those avoiding gluten.
Ingredients
Dry Ingredients
- 1 1/2 cups gluten-free all-purpose flour
- 1 tablespoon baking powder
- 1/4 teaspoon salt
- 3 tablespoons granulated sugar
Wet Ingredients
- 1/4 cup unsalted butter, cold and cubed
- 1/2 cup milk of choice (dairy or non-dairy)
- 1 large egg
- 1 teaspoon vanilla extract
Optional Add-ins
- 1/2 cup dried fruits (such as raisins or cranberries) or chocolate chips
Instructions
- Mix Dry Ingredients: In a large bowl, whisk together the gluten-free flour, baking powder, salt, and sugar to ensure even distribution of leavening and seasonings.
- Cut in Butter: Add the cold cubed butter to the flour mixture. Using a pastry cutter or your fingers, work the butter into the flour until the mixture resembles coarse crumbs, which helps achieve a flaky texture.
- Combine Wet Ingredients: In a separate bowl, whisk together the milk, egg, and vanilla extract until well combined, preparing your wet mixture for incorporation.
- Mix Dough: Pour the wet ingredients into the dry ingredients and stir just until combined; avoid overmixing to keep the scones tender. The dough should be slightly sticky at this stage.
- Add Optional Ingredients: If desired, gently fold in dried fruits or chocolate chips for added flavor and texture.
- Shape Dough: Lightly dust a clean surface with gluten-free flour and turn the dough out onto it. Gently pat the dough into a circle about 1 inch thick to prepare for cutting.
- Cut into Wedges: Using a sharp knife, cut the dough circle into 6 to 8 evenly sized wedges to ensure uniform cooking.
- Preheat Air Fryer: Set the air fryer to 350°F (175°C) and allow it to preheat, ensuring even and efficient cooking.
- Arrange Scones: Place a piece of parchment paper in the air fryer basket and arrange the scone wedges on the paper, leaving space between each piece to allow air circulation.
- Air-Fry: Cook the scones for 12 to 15 minutes or until they turn golden brown and are cooked through, signifying they are ready.
- Cool and Serve: Carefully remove the scones from the air fryer and transfer them to a wire rack to cool slightly before enjoying them warm.
Notes
- For extra crispiness, ensure butter is very cold before incorporating it into the flour.
- Do not overmix the dough to prevent tough scones.
- You can substitute dried fruits with other mix-ins like nuts or seeds based on preference.
- Milk can be dairy or any plant-based alternative, depending on dietary needs.
- Let the scones cool slightly before serving to enhance flavor and texture.


