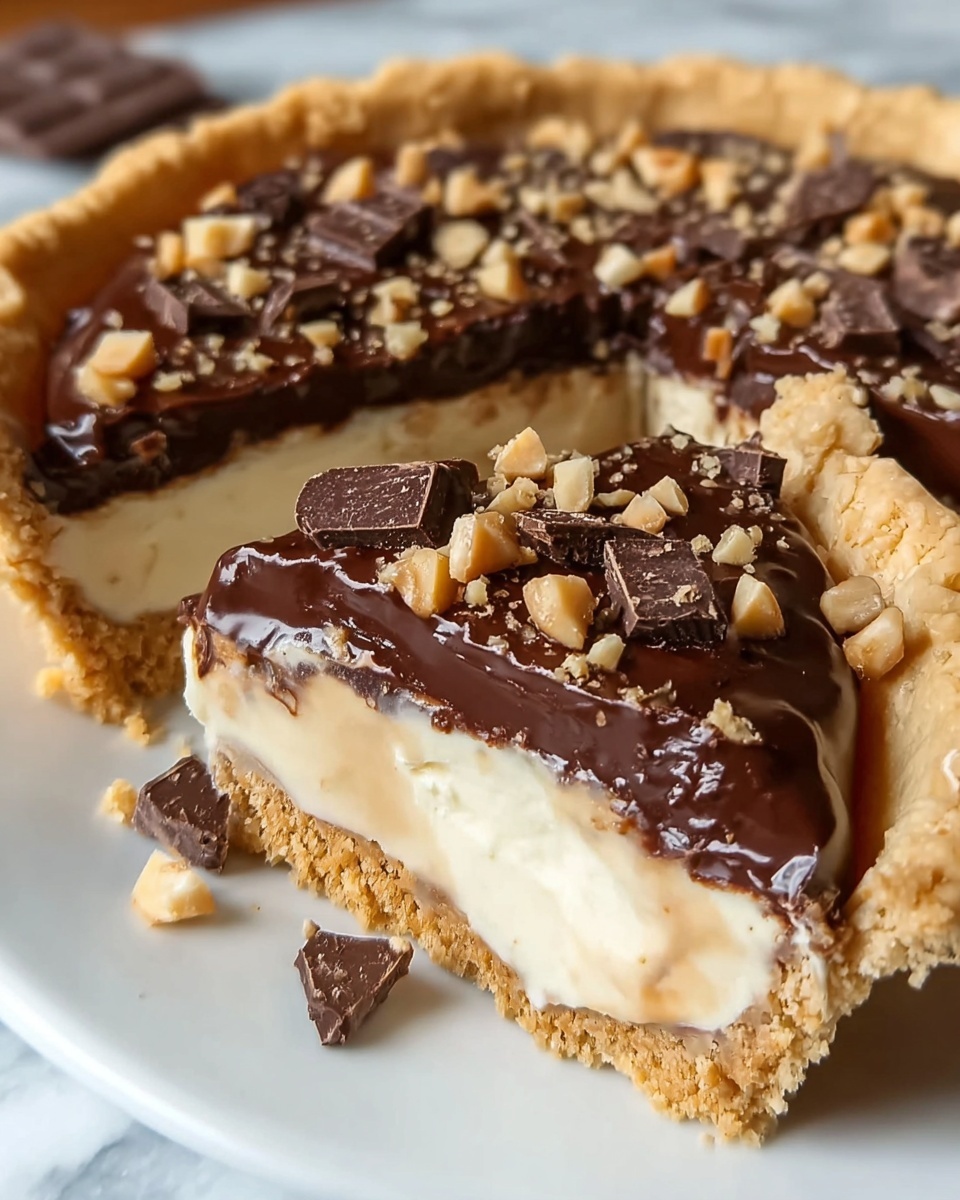
If you have a sweet tooth that craves the perfect balance of rich, chocolatey goodness and a silky, melt-in-your-mouth texture, then you are going to adore Tricia’s Fantastic Fudge Pie Recipe. This pie brings the ultimate fudge experience into a simple dessert that feels decadent but is surprisingly easy to make. Its luscious filling paired with a buttery crust will quickly turn any occasion into a celebration of flavor. Trust me, once you try Tricia’s Fantastic Fudge Pie Recipe, it will become your go-to dessert for gatherings or a cozy night in.
Ingredients You’ll Need
Gathering the right ingredients is the first step to nailing Tricia’s Fantastic Fudge Pie Recipe. Each component is thoughtfully chosen to build that luscious texture, deep chocolate flavor, and perfect pie foundation.
- Pre-made 9-inch pie crust: Using a ready crust saves time and ensures a flaky, buttery base that supports the fudge filling beautifully.
- 1/2 cup unsalted butter, melted: Adds richness and helps create that smooth, fudgy consistency in the filling.
- 1 1/2 cups granulated sugar: Sweetens the pie just right, balancing the chocolate’s natural bitterness.
- 1/4 cup unsweetened cocoa powder: Provides the deep chocolate flavor that’s essential to Tricia’s Fantastic Fudge Pie Recipe.
- 1/4 tsp salt: Enhances all the flavors and prevents the chocolate from tasting flat.
- 3 large eggs: Bind the ingredients and give the pie its creamy, custard-like texture.
- 1 tsp vanilla extract: Adds a subtle warmth and depth to the chocolate notes.
- 1/2 cup all-purpose flour: Helps stabilize the filling while keeping it tender.
- 1/2 cup semi-sweet chocolate chips (optional): For an extra punch of luxurious chocolate melts within the pie.
How to Make Tricia’s Fantastic Fudge Pie Recipe
Step 1: Preheat Your Oven and Prepare the Crust
Start by preheating your oven to 350°F (175°C). While the oven warms up, place your pie crust into a 9-inch pie dish so it’s ready to receive that fudgy filling. This sets the stage for a perfectly baked crust that holds all the luscious filling without sogginess.
Step 2: Whisk Together the Fudge Pie Filling
In a medium bowl, whisk the melted butter, sugar, cocoa powder, and salt until everything is smooth and glossy. This step is crucial because it helps dissolve the sugar and blend the cocoa evenly. Next, add your eggs and vanilla extract, whisking until fully combined. Finally, stir in the flour gradually until the mixture is silky and uniform. If you want to elevate the richness, gently fold in those chocolate chips for delightful pockets of melted chocolate throughout the pie.
Step 3: Pour the Filling into Your Pie Crust
Now it’s time to bring it all together. Pour your delicious fudge filling evenly into the prepared pie crust. Take a minute to spread it gently if needed so the filling bakes evenly and looks irresistible once out of the oven.
Step 4: Bake Until Set with a Slightly Soft Center
Bake the pie for 35 to 40 minutes. You’re looking for a top that appears set and firm, but when you insert a toothpick into the center, it should come out with a few moist crumbs clinging to it — definitely not wet batter. This balance creates that signature fudge pie texture: slightly gooey but baked through. The pie will continue to firm up as it cools, so resist the urge to overbake.
Step 5: Cool Completely Before Serving
Patience is key here. Allow your pie to cool completely on a wire rack before slicing. This cooling time lets the fudge set fully, making every slice clean and perfect. When ready, serve it plain or dress it up with a swirl of whipped cream, a scoop of vanilla ice cream, or some fresh berries to brighten the decadent chocolate flavor.
How to Serve Tricia’s Fantastic Fudge Pie Recipe
Garnishes
While this pie can easily stand on its own, adding some garnishes highlights its decadence even more. A dollop of whipped cream creates a lovely contrast to the rich chocolate, while a few fresh raspberries or sliced strawberries add a pop of color and a hint of tartness that cuts through the sweetness beautifully.
Side Dishes
Pairing Tricia’s Fantastic Fudge Pie Recipe with complementary sides can elevate your dessert spread. A simple vanilla ice cream scoop is classic and comforting, or you might enjoy a light espresso to balance the fudge’s richness. For an unexpected twist, serve it alongside a bright fruit salad with citrus notes to refresh the palate.
Creative Ways to Present
Want to make your dessert truly show-stopping? Consider serving kid-sized individual portions using mini pie crusts or tart pans for a charming presentation. You could also drizzle a little caramel or raspberry sauce on the plate before placing each slice to add flair and extra flavor. Sprinkling some flaky sea salt on top before serving brings out the fudge pie’s complex sweetness in an irresistible way.
Make Ahead and Storage
Storing Leftovers
Leftover Tricia’s Fantastic Fudge Pie Recipe keeps beautifully when stored in the refrigerator. Cover the pie tightly with plastic wrap or place it in an airtight container to prevent it from drying out or absorbing fridge odors. It should stay fresh and fudgy for up to 4 days, giving you plenty of delicious seconds.
Freezing
If you want to keep the pie longer, freezing is a great option. Wrap it tightly in plastic wrap and then foil before placing it in the freezer. Frozen fudge pie maintains its texture wonderfully and can be stored for up to 2 months. Just be sure to thaw it fully in the refrigerator before serving for the best taste and texture.
Reheating
To enjoy leftover pie warm, gently reheat individual slices in the microwave for about 15-20 seconds or until just warmed through. Avoid overheating as the pie can lose its gooey fudge texture. You can also warm the whole pie in a low oven (around 275°F) for 10-15 minutes, but cooling first is still best for perfect slicing.
FAQs
Can I make the pie crust from scratch for Tricia’s Fantastic Fudge Pie Recipe?
Absolutely! While a pre-made crust is convenient, a homemade pie crust can add even more buttery flakiness. Just make sure it’s fully cooled before filling and baking to keep the texture just right.
Is it necessary to use chocolate chips in the filling?
The chocolate chips are optional but highly recommended for added richness and texture. They melt into little bursts of gooey chocolate that make the pie extra special.
Can I use a different type of cocoa powder?
For the best results, stick to unsweetened cocoa powder as it delivers intense chocolate flavor without extra sweetness. Dutch-processed cocoa can be used but may alter the taste slightly.
How do I know when the pie is done baking?
The pie is ready when the top looks set and the center jiggles slightly but isn’t liquid. A toothpick inserted should come out with a few moist crumbs, not wet batter. This ensures your fudge pie will be perfectly fudgy and not undercooked or dry.
Can I make Tricia’s Fantastic Fudge Pie Recipe vegan?
While this recipe relies on eggs and butter for its signature texture, you could experiment with vegan substitutes like flax eggs and plant-based butter. Results may vary, so some trial and error might be needed!
Final Thoughts
Making Tricia’s Fantastic Fudge Pie Recipe is like inviting a little bit of chocolate heaven into your kitchen. It’s straightforward, yet so remarkably delicious that it’s sure to become one of your all-time favorites. Whether you’re baking for friends, family, or just indulging yourself, this fudge pie promises to satisfy every chocolate craving in the warmest, richest way possible. Give it a try—you won’t regret it!
Print
Tricia’s Fantastic Fudge Pie Recipe
- Prep Time: 10 minutes
- Cook Time: 35-40 minutes
- Total Time: 45-50 minutes
- Yield: 8 to 10 servings
- Category: Dessert
- Method: Baking
- Cuisine: American
Description
Tricia’s Fantastic Fudge Pie is a rich and indulgent chocolate dessert featuring a buttery, flaky pie crust filled with a smooth and fudgy cocoa-based filling. Perfectly baked to a soft center with a firm top, this pie is a crowd-pleaser for chocolate lovers and pairs wonderfully with whipped cream or vanilla ice cream.
Ingredients
Pie Crust
- 1 pre-made 9-inch pie crust (or homemade pie crust)
Filling
- 1/2 cup unsalted butter, melted
- 1 1/2 cups granulated sugar
- 1/4 cup unsweetened cocoa powder
- 1/4 tsp salt
- 3 large eggs
- 1 tsp vanilla extract
- 1/2 cup all-purpose flour
- 1/2 cup semi-sweet chocolate chips (optional for added richness)
Instructions
- Preheat the Oven: Preheat your oven to 350°F (175°C). Place the pie crust in a 9-inch pie dish and set it aside to be filled later.
- Make the Fudge Pie Filling: In a medium bowl, whisk together the melted butter, granulated sugar, unsweetened cocoa powder, and salt until the mixture is smooth and even. Add the eggs and vanilla extract, whisking thoroughly to fully combine all ingredients. Gradually stir in the all-purpose flour until the batter is smooth and well-mixed. If desired, fold in the semi-sweet chocolate chips to add extra richness to the filling.
- Pour into the Pie Crust: Pour the prepared fudge pie batter evenly into the pre-made pie crust, spreading it carefully to all edges.
- Bake the Pie: Bake in the preheated oven for 35 to 40 minutes, or until the center of the pie is set but still slightly soft. The top should look firm, and when a toothpick is inserted into the center, it should come out with a few moist crumbs attached but no wet batter. Keep in mind the pie will continue to set as it cools.
- Cool and Serve: Allow the fudge pie to cool completely on a wire rack before slicing. For added indulgence, serve with whipped cream, a scoop of vanilla ice cream, or fresh berries as garnish.
Notes
- The pie crust can be homemade or store-bought based on your preference and convenience.
- For even richer flavor, use high-quality cocoa powder and chocolate chips.
- Do not over-bake; the pie should be slightly soft in the center to maintain that fudgy texture.
- Let the pie cool completely before slicing to ensure clean cuts and proper setting.
- Optional toppings like whipped cream or vanilla ice cream make the dessert extra special.


