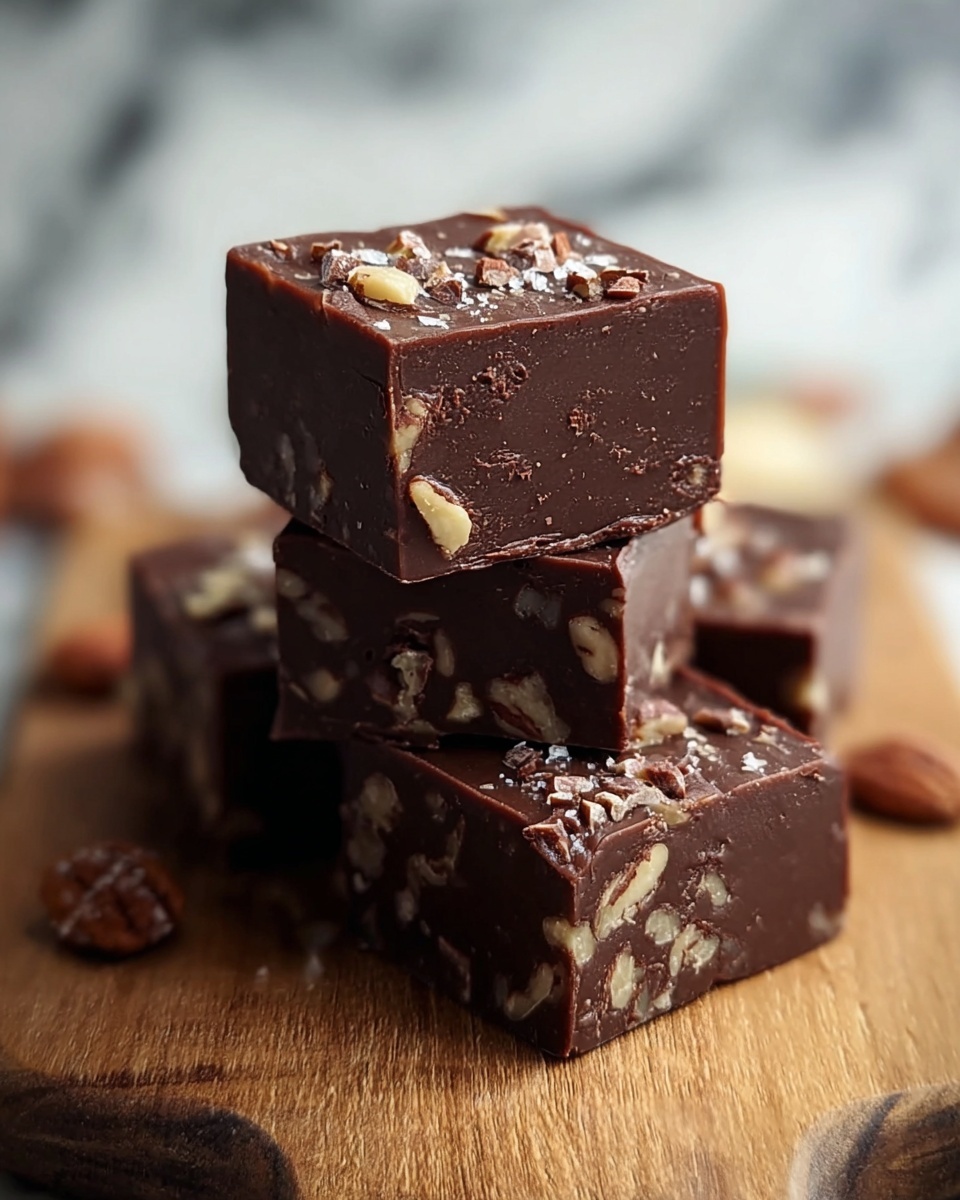
If you have a sweet tooth and a love for nostalgia, this Old Fashioned Fudge Recipe is exactly what you need. It’s that rich, creamy, melt-in-your-mouth treat that brings back memories of cozy kitchen moments with family or friendly gatherings full of laughter. This fudge combines the classic flavors of cocoa and vanilla with a smooth texture that only traditional stovetop cooking can deliver. Whether you’re a fudge enthusiast or trying your hand at candy-making for the first time, this recipe will make you fall in love with fudge all over again.
Ingredients You’ll Need
The beauty of this Old Fashioned Fudge Recipe lies in its simple, wholesome ingredients. Each one plays a crucial role in creating the perfect balance of flavor, texture, and appearance for your fudge masterpiece.
- 3 cups granulated sugar: The essential sweet base that gives the fudge its characteristic sugary richness.
- 2/3 cup whole milk: Provides creaminess and helps dissolve the sugar for a smooth consistency.
- 3/4 cup unsalted butter (cut into pieces): Adds luscious richness and keeps the fudge tender.
- 1/2 teaspoon salt: Enhances the chocolate flavor and balances the sweetness perfectly.
- 1 teaspoon vanilla extract: Imparts a warm, aromatic depth to the fudge.
- 1 cup chopped walnuts (optional): Offers a delightful crunch and a nutty contrast that complements the fudge beautifully.
- 2/3 cup unsweetened cocoa powder: Gives the fudge that deep, classic chocolate taste with no added sweetness.
How to Make Old Fashioned Fudge Recipe
Step 1: Prepare Your Pan
Start by greasing an 8×8-inch baking pan thoroughly and set it aside. This step is essential to ensure that your fudge releases easily once it has set, preserving its smooth, square shapes without any sticky mishaps.
Step 2: Combine Ingredients and Heat
In a heavy-bottomed saucepan over medium heat, combine the granulated sugar, whole milk, unsweetened cocoa powder, butter pieces, and salt. Stir constantly so all ingredients melt and mix evenly. When the mixture starts to boil, stop stirring—this is crucial for preventing grainy fudge—and let it cook undisturbed.
Step 3: Achieve the Soft Ball Stage
Allow the mixture to cook until it reaches 234°F, known as the soft ball stage on a candy thermometer. This temperature is the key to perfect fudge texture. If you don’t have a thermometer, test by dropping a bit into cold water; if it forms a soft, malleable ball, it’s ready to go.
Step 4: Cool Down Without Stirring
Remove the saucepan from heat and let it cool without stirring until the bottom of the pan feels just warm to the touch. This cooling process takes about 20 to 30 minutes and is essential for the fudge to set up properly and gain that creamy texture.
Step 5: Add Flavor and Beat
Add the vanilla extract, then beat the mixture vigorously with a wooden spoon. This step takes about 5 to 8 minutes, during which the fudge thickens and loses its glossy sheen, signaling that it’s ready to be shaped. If you’re adding walnuts, gently fold them in now.
Step 6: Pour and Set
Quickly pour the fudge into your prepared pan and spread it evenly. Let the fudge set at room temperature until firm, which typically takes about 2 hours. Once set, cut into squares, and you’ve got yourself a batch of classic homemade fudge!
How to Serve Old Fashioned Fudge Recipe

Garnishes
While this Old Fashioned Fudge Recipe tastes heavenly on its own, you can add some extra flair by sprinkling a few chopped nuts or a light dusting of powdered sugar on top right after pouring. A pinch of sea salt on the surface can also create a lovely sweet-salty contrast that makes every bite unforgettable.
Side Dishes
Fudge pairs wonderfully with warm drinks like coffee, hot chocolate, or a glass of cold milk. If you’re serving it at a party, consider offering fresh fruit like strawberries or sliced apples to balance the richness of the fudge with a refreshing burst.
Creative Ways to Present
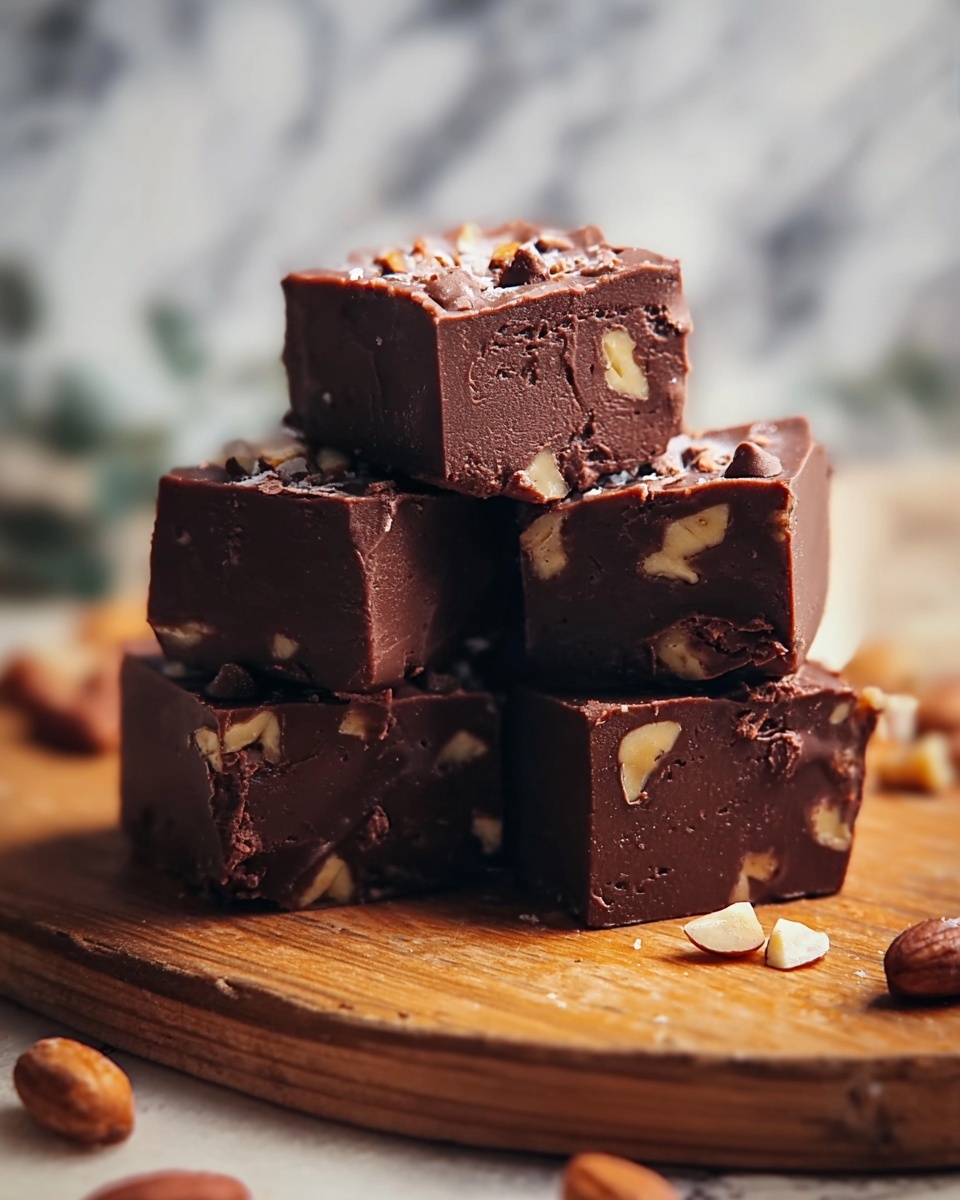
Cut your fudge into neat squares and wrap each piece in colorful wax paper or place them in small gift boxes for a charming homemade gift. You can also layer different types of fudge in clear jars for a beautiful, edible display that looks as good as it tastes.
Make Ahead and Storage
Storing Leftovers
Store leftover fudge in an airtight container at room temperature for up to one week. Keeping it wrapped well prevents it from drying out and losing its just-made softness. Avoid refrigerating, which can harden the fudge unnecessarily.
Freezing
If you want to keep your fudge longer, you can freeze it. Wrap it tightly in plastic wrap and then place it inside a freezer-safe container. Thaw at room temperature before serving to maintain that perfect creamy texture and flavor.
Reheating
Reheating isn’t typically necessary, but if your fudge becomes too firm, letting it sit at room temperature for a while is the best way to soften it. Avoid microwave reheating as it can alter the fudge’s texture and cause unwanted separation.
FAQs
Can I make this Old Fashioned Fudge Recipe without nuts?
Absolutely! The walnuts are entirely optional and can be omitted if you prefer a nut-free fudge or if someone has nut allergies. The fudge will still be rich and delicious.
What if I don’t have a candy thermometer?
No worries! Use the cold water test method—drop a small spoonful of the hot fudge mixture into cold water. If it forms a soft, pliable ball, it’s at the perfect soft ball stage for fudge.
Can I substitute the cocoa powder with chocolate chips?
While you can try, this recipe is designed for unsweetened cocoa powder to achieve the classic fudge intensity. Chocolate chips contain sugar and stabilizers that could change the consistency, so adjustments would be needed.
Why shouldn’t I stir the fudge while it’s boiling?
Stirring during the boil can cause sugar crystallization, which leads to gritty fudge instead of smooth and creamy. It’s important to stir only until it starts boiling, then let it cook undisturbed.
How long does it take for the fudge to set completely?
At room temperature, your fudge will take about 2 hours to become firm enough to cut and serve. Cooler conditions might require a bit more time, so patience really pays off here.
Final Thoughts
I can’t recommend this Old Fashioned Fudge Recipe enough if you’re craving a comforting, classic dessert that tastes like a heartfelt homemade treasure. It’s straightforward enough for beginners yet rewarding enough to impress even the toughest fudge critics. So go ahead, gather those simple ingredients, stir up a batch, and share the joy of old-fashioned sweetness with the people you love.
Print
Old Fashioned Fudge Recipe
- Prep Time: 10 minutes
- Cook Time: 20 minutes
- Total Time: 2 hours 30 minutes
- Yield: 36 pieces
- Category: Dessert
- Method: Stovetop
- Cuisine: American
- Diet: Vegetarian
Description
This Old Fashioned Fudge recipe offers a rich, creamy, and nostalgic chocolate treat that’s perfect for any occasion. Made with simple ingredients like granulated sugar, cocoa powder, and butter, it captures the classic homemade fudge flavor with a smooth texture and optional crunchy walnuts. The stovetop cooking method ensures precise control during the candy-making process, resulting in a perfect soft-set fudge.
Ingredients
Fudge Base
- 3 cups granulated sugar
- 2/3 cup whole milk
- 2/3 cup unsweetened cocoa powder
- 3/4 cup unsalted butter (cut into pieces)
- 1/2 teaspoon salt
Flavoring & Add-ins
- 1 teaspoon vanilla extract
- 1 cup chopped walnuts (optional)
Instructions
- Prepare the Pan: Grease an 8×8-inch baking pan thoroughly and set it aside to ensure the fudge can be easily removed once set.
- Combine Ingredients: In a heavy-bottomed saucepan over medium heat, combine the granulated sugar, whole milk, unsweetened cocoa powder, butter pieces, and salt. Stir the mixture constantly to prevent burning and ensure ingredients are well combined.
- Boil Mixture: Continue stirring until the mixture starts boiling. Once boiling, stop stirring and let it cook undisturbed. Use a candy thermometer to monitor the temperature, allowing it to reach 234°F (soft ball stage). This is critical for proper fudge consistency.
- Cool the Mixture: Remove the pan from heat and let the mixture cool without stirring until the bottom of the pan feels just warm to the touch. This cooling process usually takes about 20 to 30 minutes and helps the fudge set properly.
- Beat the Fudge: Add the vanilla extract, then vigorously beat the mixture with a wooden spoon. Continue beating until it thickens and loses its glossy appearance, which should take about 5 to 8 minutes. This aerates the fudge and creates the right texture.
- Add Walnuts (Optional): If using, stir in the chopped walnuts evenly to add a crunchy texture to the fudge.
- Set the Fudge: Quickly pour the fudge into the prepared baking pan and spread it out evenly. Let it set at room temperature for about 2 hours or until firm enough to cut.
- Serve: Once set, cut the fudge into 36 squares and serve. Store any leftovers in an airtight container at room temperature for up to a week.
Notes
- Avoid stirring the mixture once it starts boiling to prevent sugar crystallization, which can cause grainy fudge.
- If you don’t have a candy thermometer, test readiness by dropping a small amount of the hot mixture into cold water; if it forms a soft ball, it is ready.
- Store fudge in an airtight container at room temperature for up to one week to maintain freshness.


