
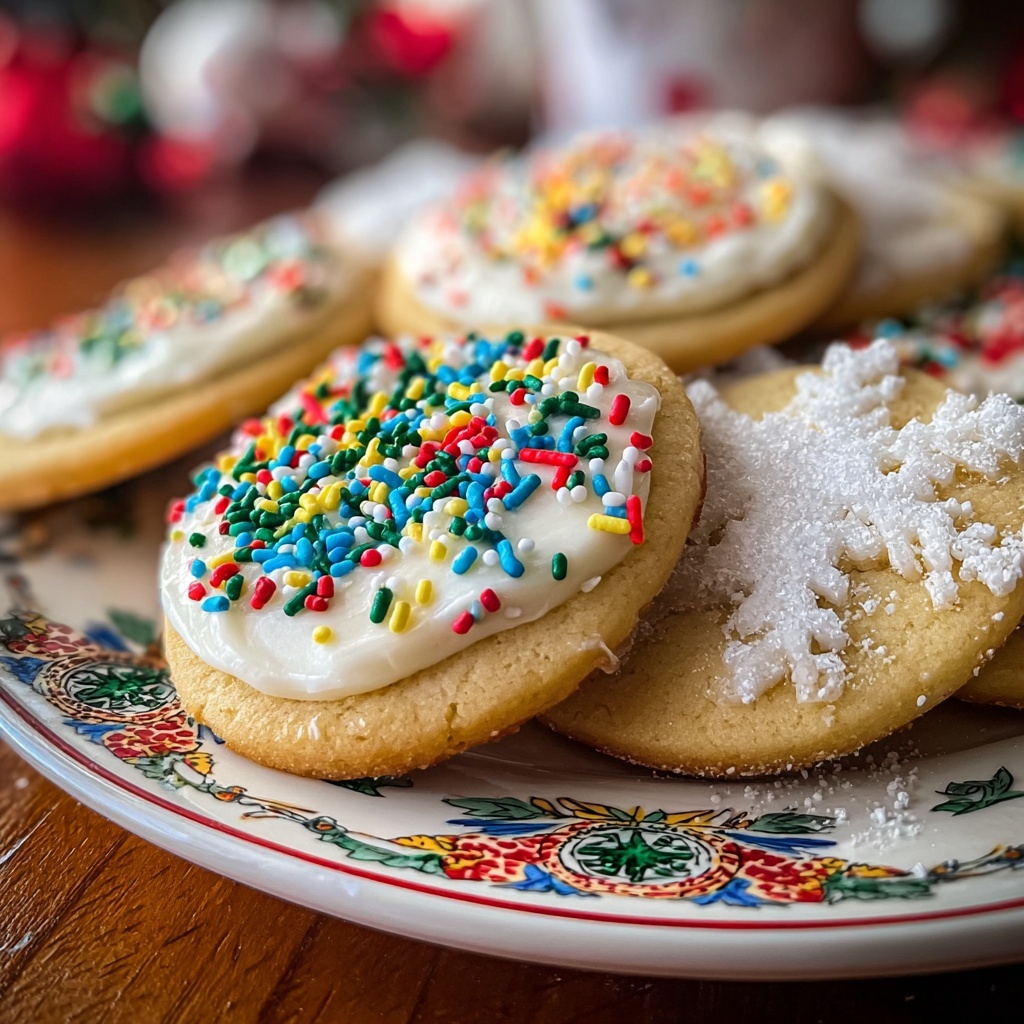
If you’re looking to brighten up your holiday season with a fun, festive treat, the Iced Sugar Holiday Lights Cookies Recipe is just what you need. These charming cookies bring together a tender sugar cookie base that’s perfectly buttery and sweet, paired with vibrant, colorful icing that mimics glowing holiday lights. The combination of soft texture and decorative sparkle will make these cookies the centerpiece of any holiday gathering, perfect for sharing with friends, family, or even leaving out for Santa. Get ready to bake, decorate, and enjoy a cookie tradition that feels both classic and joyfully bright.
Ingredients You’ll Need
While the ingredient list is simple, each component plays a crucial role in making these cookies absolutely delightful—from the fluffy texture of the dough to the colorful, glossy icing that shines like real holiday lights.
- All-purpose flour (2 3/4 cups): The foundation of your cookies, ensuring they’re tender but firm enough to hold their shape when baked.
- Baking soda (1 teaspoon): Helps the cookies rise slightly for a light texture without spreading too much.
- Baking powder (1/2 teaspoon): Works with baking soda to give the perfect soft crumb.
- Unsalted butter, softened (1 cup): Adds rich flavor and a melt-in-your-mouth softness.
- White sugar (1 1/2 cups): Sweetens the cookies and aids in that slight crisp around the edges.
- Egg (1): Binds everything together and contributes to the cookie’s chewy interior.
- Vanilla extract (1 teaspoon): Gives a warm, comforting aroma and depth of flavor.
- Almond extract (1/2 teaspoon): Adds a subtle, festive hint that complements the sugar cookie base wonderfully.
- Powdered sugar (3 cups): Essential for creating the smooth, sweet icing that decorates the cookies.
- Milk (2 to 3 tablespoons): Adjusts the icing to just the right consistency for piping or spreading.
- Food coloring: Choose your favorite festive colors like red, green, yellow, and blue to make the “lights” truly shine.
- Sprinkles or edible decorative glitter (optional): For that final touch of sparkle and holiday magic.
How to Make Iced Sugar Holiday Lights Cookies Recipe
Step 1: Get Ready
Start by preheating your oven to 375°F (190°C) and lining your baking sheets with parchment paper. This simple step ensures your cookies bake evenly and never stick, making cleanup a breeze.
Step 2: Combine the Dry Ingredients
Whisk together the all-purpose flour, baking soda, and baking powder in a medium bowl. This pre-mixing of dry ingredients will help you incorporate them smoothly into the wet ingredients later, avoiding lumps and ensuring a uniform cookie texture.
Step 3: Cream Butter and Sugar
Using an electric mixer, cream the softened unsalted butter with the white sugar until the mixture is smooth and fluffy. This typically takes 2 to 3 minutes, and it’s the secret behind a tender cookie that melts in your mouth.
Step 4: Add Flavors
Beat in the egg, vanilla extract, and almond extract until everything is thoroughly combined. The almond extract adds a subtle but unforgettable note—it’s what makes these cookies feel special and perfect for the holidays.
Step 5: Mix Dough
Gradually add the dry flour mixture to the wet ingredients, stirring just until incorporated. Avoid mixing too much here to keep the cookies tender and light.
Step 6: Shape Cookies
Roll the dough into small balls and space them about 2 inches apart on your parchment-lined sheets. Press each ball down slightly with the bottom of a glass or your palm to create a flat surface that bakes evenly and is perfect for decorating.
Step 7: Bake and Cool
Bake the cookies for 8 to 10 minutes until the edges turn a light golden brown. Allow them to cool on the baking sheets for 5 minutes before transferring to a wire rack. Completely cooled cookies give your icing the perfect chance to stick without melting away.
Step 8: Make the Icing
While your cookies cool, whip up the icing by mixing powdered sugar with 2 tablespoons of milk until smooth. Add more milk gradually if the icing feels too thick, aiming for a pourable but not runny consistency. This icing is the canvas for your colorful decorations.
Step 9: Color Your Icing
Divide the icing into small bowls, then mix in your chosen food coloring to create vibrant hues. Whether it’s classic holiday reds and greens or a rainbow of festive shades, these colors turn your cookies into glowing holiday lights.
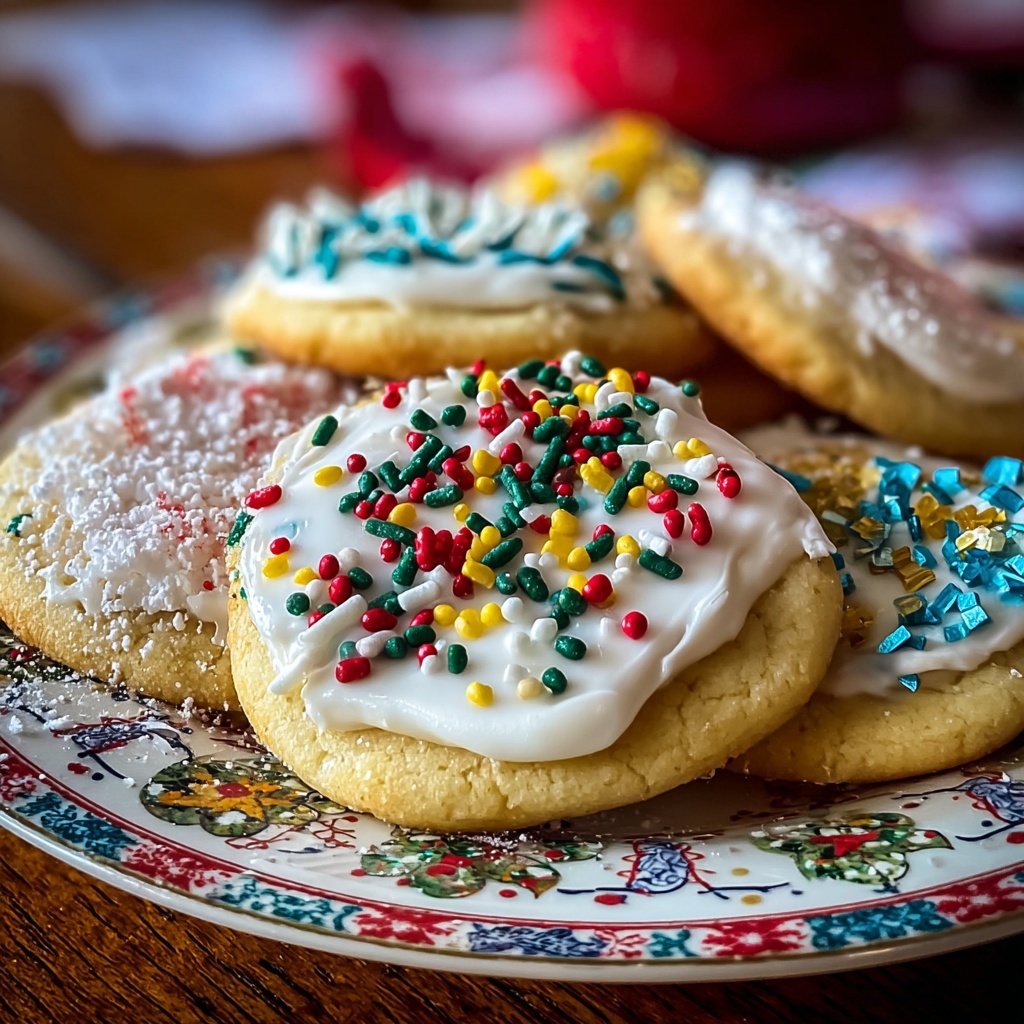
Step 10: Decorate
Once the cookies are completely cooled, decorate each one using a piping bag or small spatula. Create shapes resembling holiday string lights or simply spread colorful patterns that bring the spirit of the season to life.
Step 11: Add Sparkle
Sprinkle on edible glitter or festive sprinkles while the icing is still wet for a dazzling effect that catches the light—just like real holiday decorations.
Step 12: Set and Store
Let the icing dry fully before storing the cookies in an airtight container to maintain freshness and keep your beautiful decorations intact.
How to Serve Iced Sugar Holiday Lights Cookies Recipe
Garnishes
For an extra festive flourish, garnish your iced sugar holiday lights cookies with small silver dragees or red and green sanding sugar. These little details add shine and festive texture, making your cookies irresistible at first glance.
Side Dishes
Serve these cookies alongside a warm cup of spiced cider, hot cocoa, or a creamy eggnog for the ultimate holiday indulgence. The gentle sweetness of the cookies pairs beautifully with the warmth and spice of seasonal drinks.
Creative Ways to Present
Arrange the cookies on a festive platter or string them on a decorative ribbon for a charming edible garland. You could also package them individually in cellophane bags tied with colorful ribbons, making wonderful homemade gifts that deliver holiday cheer.
Make Ahead and Storage
Storing Leftovers
Keep leftover cookies fresh by storing them in an airtight container at room temperature. They will stay soft and delicious for up to one week, making them a perfect make-ahead treat for upcoming celebrations.
Freezing
You can freeze the baked and decorated cookies by placing them in a single layer on a baking sheet until firm, then transferring them to a freezer-safe container. This technique prevents the icing from smearing, and your iced sugar holiday lights cookies recipe will keep well for up to three months.
Reheating
Enjoy leftover cookies at room temperature or warm them gently in the microwave for about 10 seconds. Avoid reheating too long so you don’t lose the delicate texture or melt the icing away.
FAQs
Can I use margarine instead of butter?
While margarine is an option, butter provides the best flavor and texture for these cookies. Butter’s richness and ability to cream well with sugar are what make the cookies tender and deliciously flavorful.
How thick should I roll or shape the dough?
Rolling the dough into small balls and flattening them slightly works best. You want about 1/4-inch thickness to ensure the cookies bake evenly and remain tender but sturdy enough for decorating.
Can I make these cookies gluten-free?
You can substitute a gluten-free all-purpose flour blend for the regular flour, but results may vary slightly. Be sure to use a blend that contains xanthan gum for best texture.
What is the best way to get the icing consistency right?
Start with less milk and add a little at a time until the icing is pourable but not overly runny. This balance allows for smooth application and bright colors that hold their shape once dried.
Can kids help with decorating the cookies?
Absolutely! Decorating is one of the best parts of the Iced Sugar Holiday Lights Cookies Recipe. Kids can have so much fun choosing colors, adding sprinkles, and creating their own holiday light designs.
Final Thoughts
Nothing says joyful holiday baking quite like the Iced Sugar Holiday Lights Cookies Recipe. These cookies bring warmth, color, and a sprinkle of festive magic to any table. Whether you’re baking with family or creating edible gifts, this recipe turns simple ingredients into a cheerful tradition you’ll want to make year after year. So gather your ingredients, have fun decorating, and share the holiday spirit in every bite!
Print
Iced Sugar Holiday Lights Cookies Recipe
- Prep Time: 0h 30m
- Cook Time: 0h 10m
- Total Time: 0h 40m
- Yield: Approximately 36 cookies
- Category: Dessert
- Method: Baking
- Cuisine: American
Description
Delight in these festive Iced Sugar Holiday Lights Cookies, perfect for celebrating the season with vibrant colors and sweet flavors. Soft, buttery sugar cookies are baked to golden perfection, then decorated with brightly colored icing to mimic holiday lights, making them as fun to create as they are to enjoy.
Ingredients
Dry Ingredients
- 2 3/4 cups all-purpose flour
- 1 teaspoon baking soda
- 1/2 teaspoon baking powder
Wet Ingredients
- 1 cup unsalted butter, softened
- 1 1/2 cups white sugar
- 1 egg
- 1 teaspoon vanilla extract
- 1/2 teaspoon almond extract
Icing
- 3 cups powdered sugar
- 2 to 3 tablespoons milk
- Food coloring (red, green, yellow, blue, etc.)
- Sprinkles or edible decorative glitter (optional)
Instructions
- Preheat and prepare baking sheets: Preheat your oven to 375°F (190°C). Line several baking sheets with parchment paper to ensure the cookies do not stick during baking.
- Mix dry ingredients: In a medium bowl, whisk together the all-purpose flour, baking soda, and baking powder. Set this mixture aside for later use.
- Cream butter and sugar: Using an electric mixer, cream the softened butter and white sugar in a large bowl until the mixture is smooth and fluffy, about 2-3 minutes. This step ensures a light texture in the cookies.
- Add flavorings and egg: Beat in the egg, vanilla extract, and almond extract until all components are well combined, adding moisture and flavor.
- Combine wet and dry ingredients: Gradually add the flour mixture into the creamed mixture, mixing just until incorporated to avoid overworking the dough which could make the cookies tough.
- Form cookie dough balls: Roll the dough into small balls and arrange them on the prepared baking sheets, spacing about 2 inches apart to allow spreading. Flatten each ball slightly with the palm of your hand or the bottom of a glass.
- Bake cookies: Bake in the preheated oven for 8 to 10 minutes until the edges turn lightly golden. Remove from the oven and let them cool on the baking sheets for 5 minutes before transferring to a wire rack to cool completely.
- Prepare icing: While the cookies cool, mix powdered sugar with 2 tablespoons of milk in a medium bowl until smooth. Adjust consistency by adding milk gradually if the icing is too thick, aiming for a pourable texture.
- Create colored icing: Divide the icing into small bowls and add food coloring drops to each to create your preferred colors for decorating.
- Decorate cookies: When cookies are fully cooled, use a piping bag or small spatula to decorate them with the colored icing, crafting designs that resemble holiday lights.
- Add sparkle: Optionally, sprinkle edible glitter or colored sprinkles on top of the icing to add festive sparkle and texture.
- Dry and store: Allow the decorated cookies to dry completely before storing them in an airtight container to preserve freshness and prevent smudging.
Notes
- Ensure the cookies are completely cooled before icing to prevent melting.
- Adjust the thickness of icing depending on your preferred decorating technique; thicker for piping, thinner for flooding.
- Use parchment paper for easier cleanup and to prevent sticking.
- Decorate with edible glitter or sprinkles to add festive appeal and texture.
- Store cookies in an airtight container at room temperature for up to one week.

