
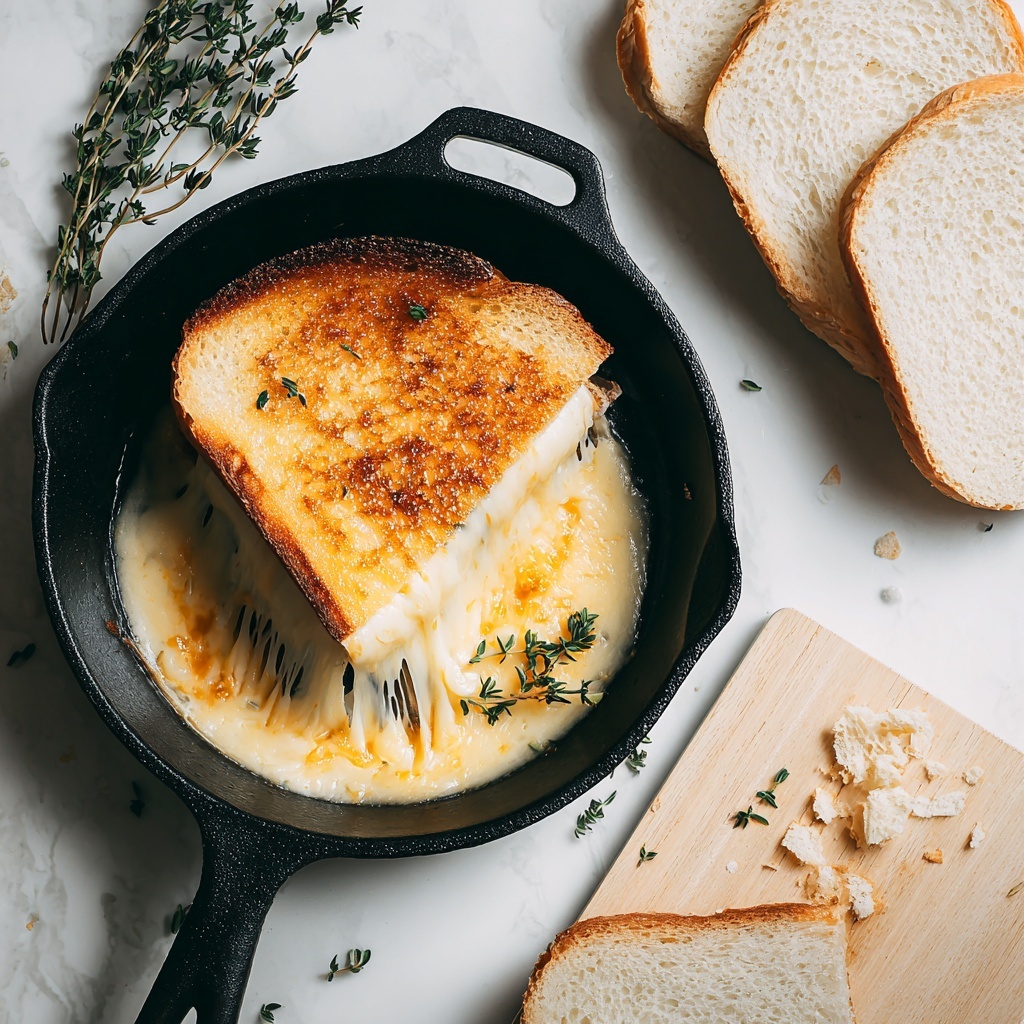
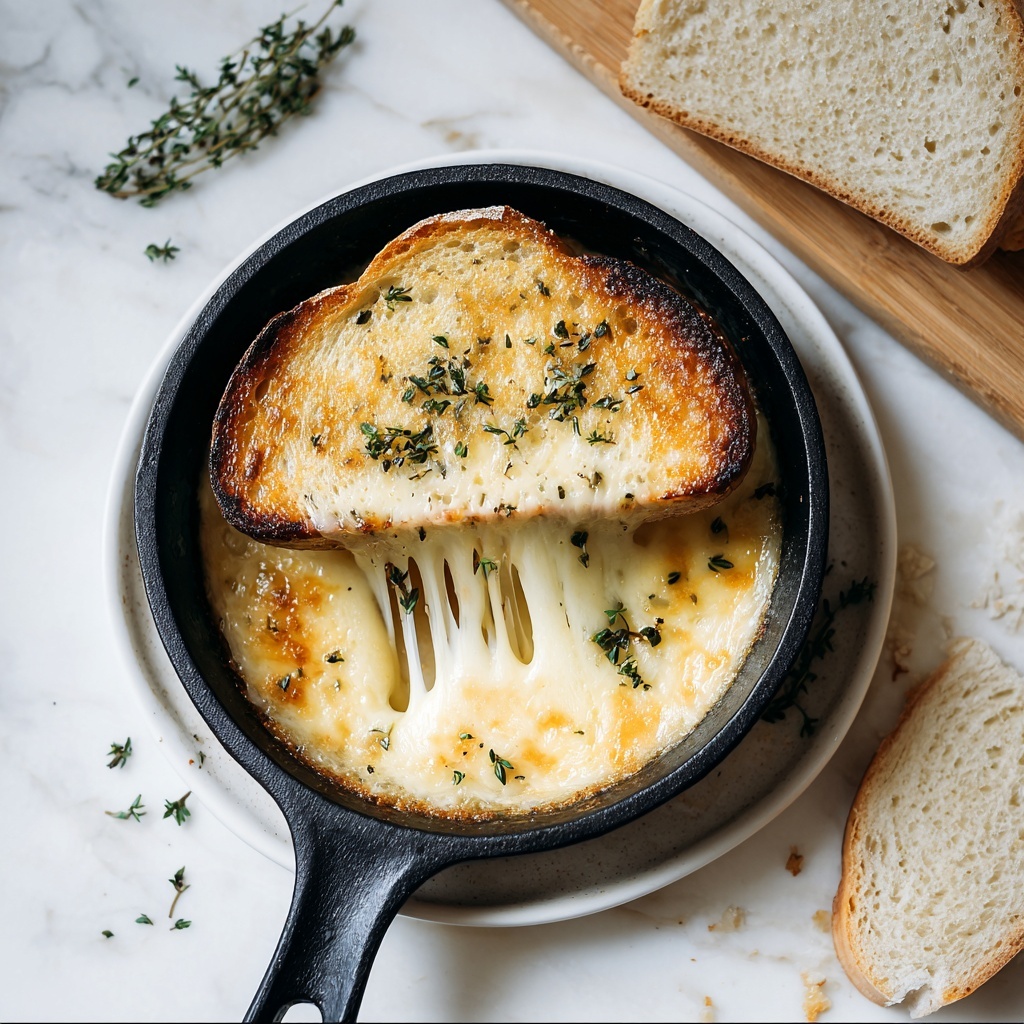
If you’re craving comfort food that feels like a warm hug on a plate, this Grilled Cheese Sandwiches Recipe is exactly what you need. Crispy, golden bread enveloping perfectly melted, gooey cheese creates a simple yet utterly satisfying taste experience that never goes out of style. Whether you’re whipping up a quick lunch or indulging in a nostalgic snack, this recipe shows that with just a few basic ingredients, you can create a delicious classic that’s always a crowd-pleaser.
Ingredients You’ll Need
With just a handful of everyday ingredients, this recipe shines by focusing on quality and simplicity. Each component plays a vital role in delivering the unbeatable flavor, inviting crispy textures, and that beautiful golden color you crave.
- Bread: Choose your favorite type, from classic white to hearty whole wheat, for the perfect crispy crust.
- Butter: Spread evenly to ensure an even, rich browning and a buttery crunch on every bite.
- Cheese slices: Use cheese that melts well like American, cheddar, or a blend, bringing creaminess and depth to the sandwich.
How to Make Grilled Cheese Sandwiches Recipe
Step 1: Preheat Your Pan
Start by warming a skillet or griddle over medium heat. This ensures your sandwiches cook evenly, allowing the cheese to melt perfectly without burning the bread. Patience here is key for that golden-brown finish.
Step 2: Butter the Bread
Spread butter evenly on one side of each slice of bread. This not only prevents sticking but also gives the sandwich its signature crispy, buttery crust that makes every bite irresistible.
Step 3: Layer Your Sandwich
Place half of the bread slices buttered side down in the hot skillet. These form the base that crisps to a perfect golden hue. Then add a slice of cheese atop each, followed by the remaining bread slices with the buttered side facing up.
Step 4: Cook Until Golden and Melty
Let the sandwiches cook for about 2–4 minutes on the first side until the bread turns beautifully golden and the cheese begins to soften. Then, carefully flip them with a spatula, cooking an additional 2–4 minutes on the other side to complete the melt and achieve even browning.
Step 5: Repeat and Serve
Remove your finished sandwiches from the skillet and repeat the process with the remaining bread, butter, and cheese until all sandwiches are made. Serve immediately while the cheese is still deliciously gooey and the bread at its crispiest.
How to Serve Grilled Cheese Sandwiches Recipe
Garnishes
Even though grilled cheese sandwiches are delightful on their own, adding a sprinkle of fresh herbs like chives or a light dusting of smoked paprika can elevate the flavor and visual appeal. A side of tangy pickles also offers a delightful contrast to the richness.
Side Dishes
Pair your sandwiches with classic tomato soup for an unbeatable combo, or try a crisp salad to add freshness and balance. For a fun twist, serve with sweet potato fries or crunchy coleslaw for added texture and flavor variety.
Creative Ways to Present
Slice the sandwiches into fun shapes using cookie cutters for kids or cut them into smaller finger-sized portions to serve at gatherings. Layer different cheeses or add extras like caramelized onions or sliced tomatoes inside to make your grilled cheese uniquely yours.
Make Ahead and Storage
Storing Leftovers
If you have leftover grilled cheese sandwiches, wrap them tightly in aluminum foil or plastic wrap and store in the refrigerator for up to 2 days. This helps maintain their freshness and keeps the bread from becoming soggy.
Freezing
You can freeze grilled cheese sandwiches by wrapping each one individually in plastic wrap and then placing them in a freezer-safe bag. Freeze for up to 1 month. When you’re ready to eat, thaw overnight in the refrigerator for best results.
Reheating
To reheat, place the sandwich on a skillet over low heat until the cheese melts and the bread crisps back up. Avoid microwaving if possible, as it tends to make the bread soft instead of crunchy.
FAQs
Can I use different types of cheese in this Grilled Cheese Sandwiches Recipe?
Absolutely! Feel free to experiment with cheeses like mozzarella, gouda, or pepper jack. Each cheese brings its own unique flavor and melting qualities, adding a new twist to this classic sandwich.
Is it better to use butter or mayonnaise on the bread?
Butter provides a rich, classic flavor and crisp texture, but mayonnaise can create an even crispier and tangier crust. Both work well, so it depends on your preference.
How do I prevent the bread from burning before the cheese melts?
Cooking over medium or medium-low heat allows the cheese to melt slowly while the bread crisps evenly. Rushing the process by turning up the heat often leads to burnt bread and unmelted cheese.
Can I add extras like tomatoes or bacon to this recipe?
Yes! Adding extras such as sliced tomatoes, crispy bacon, or even avocado can enhance texture and flavor, turning the grilled cheese sandwich into a more substantial meal.
What is the best bread for a grilled cheese sandwich?
While classic white bread is popular, sturdy breads like sourdough, rye, or multigrain hold up well and add extra flavor and texture to your sandwich.
Final Thoughts
This Grilled Cheese Sandwiches Recipe is a timeless treasure in the world of comfort food. It’s simple, satisfying, and endlessly adaptable to your taste. Next time you want to create something delicious with minimal fuss, dive into this recipe and enjoy the magic of golden, melty goodness. Your taste buds will thank you!
Print
Grilled Cheese Sandwiches Recipe
- Prep Time: 0h 5m
- Cook Time: 0h 10m
- Total Time: 0h 15m
- Yield: 4 sandwiches
- Category: Sandwich
- Method: Stovetop
- Cuisine: American
Description
This classic grilled cheese sandwich recipe features perfectly toasted bread with melted, gooey cheese in between. It’s quick to prepare and makes for a comforting, delicious meal or snack that’s sure to please all ages.
Ingredients
Ingredients
- 8 slices of bread
- 4 tablespoons of butter
- 8 slices of cheese
Instructions
- Preheat the skillet: Preheat a skillet or griddle over medium heat to ensure even toasting of the bread.
- Butter the bread: Spread butter evenly on one side of each slice of bread for a golden crisp texture during cooking.
- Place bread on skillet: Put 4 slices of bread buttered-side down on the preheated skillet to start browning.
- Add cheese: Place one slice of cheese on top of each bread slice in the skillet, allowing it to begin melting.
- Top with bread: Place another slice of bread on top of the cheese, with the buttered side facing up, to form sandwiches.
- Cook first side: Let the sandwiches cook 2 to 4 minutes until the bottom bread is golden brown and the cheese starts melting.
- Flip sandwiches: Carefully flip each sandwich using a spatula to cook the other side evenly.
- Cook second side: Cook for another 2 to 4 minutes until the second side is golden brown and the cheese is fully melted inside.
- Remove and repeat: Take the grilled sandwiches off the skillet, then repeat the cheese adding and cooking process with the remaining ingredients to make the last 2 sandwiches.
- Serve: Serve the grilled cheese sandwiches hot and enjoy their melty, crispy goodness immediately.
Notes
- Use your favorite type of cheese like cheddar, American, or mozzarella for variation.
- For extra flavor, add tomato slices or cooked bacon inside the sandwich before grilling.
- Cook on medium heat to avoid burning the bread while ensuring the cheese melts perfectly.
- Use a non-stick skillet or well-seasoned griddle for easy flipping and cleanup.
- Butter can be substituted with margarine or olive oil if preferred.


