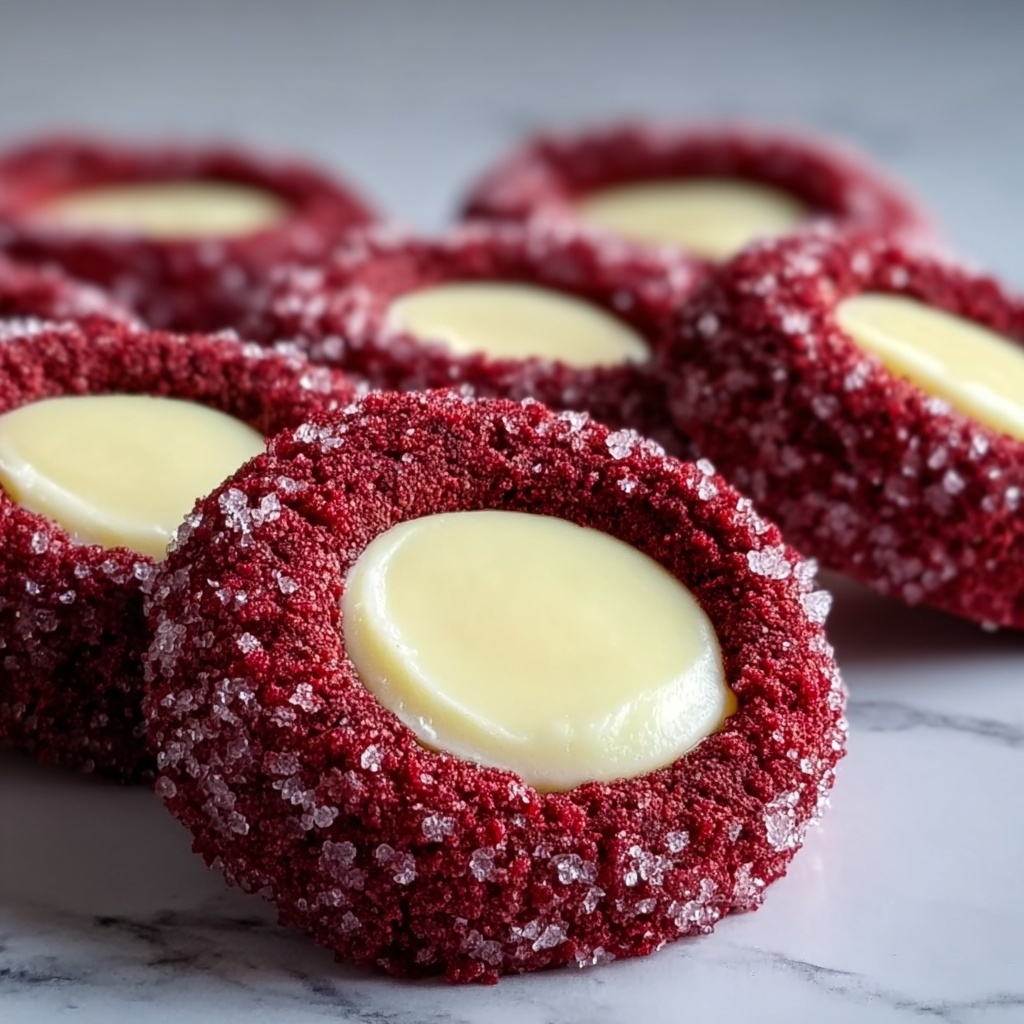
If you’re on the hunt for a show-stopping treat that perfectly balances rich cream cheese goodness with that iconic red velvet charm, look no further. This Red Velvet Cheesecake Thumbprints Recipe is a delightful twist on classic thumbprint cookies, pairing tender, cocoa-kissed red velvet dough with luscious cheesecake centers. Each bite offers a soft, melt-in-your-mouth texture bursting with vibrant colors and sweet flavors that bring pure joy. Whether you’re baking for a holiday gathering, a special occasion, or just because, these cookies will quickly become a beloved staple in your recipe collection.
Ingredients You’ll Need
The beauty of this Red Velvet Cheesecake Thumbprints Recipe lies in its straightforward ingredients, each playing a crucial role in creating that perfect balance of texture and flavor. From creamy butter that builds tenderness, to a splash of red food coloring that brings the vivid color to life, every component is essential to this dessert magic.
- Unsalted butter (1 cup, room temperature): Provides the rich, creamy base that keeps the cookies tender and moist.
- Granulated sugar (1⅓ cups): Sweetens and helps create a light, fluffy dough texture.
- Large egg yolk (1): Adds richness and binds the dough for a perfect crumb.
- Pure vanilla extract (1 teaspoon): Infuses warmth and depth in the cookie flavor.
- Liquid red food coloring (2 teaspoons): Gives that signature red velvet color that makes these thumbprints irresistible.
- All-purpose flour (2¼ cups): The foundation for structure and chewiness in the cookie.
- Unsweetened natural cocoa powder (¼ cup): Adds subtle chocolate notes that balance the sweetness and enhance red velvet’s classic taste.
- Baking powder (½ teaspoon): Helps the cookies rise lightly to achieve just the right fluffiness.
- Salt (¼ teaspoon): Elevates and rounds out the overall flavors.
- Cream cheese (4 oz, softened): The star of the filling, providing smooth and tangy cheesecake centers.
- Granulated sugar (2 tablespoons): Sweetens the cheesecake filling without overpowering it.
- Pure vanilla extract (¼ teaspoon): Adds subtle aroma and enhances the cheesecake’s creaminess.
How to Make Red Velvet Cheesecake Thumbprints Recipe
Step 1: Prepare Your Baking Space
Start by preheating your oven to 350°F (175°C) and lining your baking sheets with parchment paper. This step sets the stage for perfectly baked cookies that won’t stick and will come off the sheets effortlessly.
Step 2: Cream Butter and Sugar
Beat together the unsalted butter and granulated sugar for 2 to 3 minutes until the mixture becomes light and fluffy. This not only incorporates air for a tender crumb but also ensures your cookies have that melt-in-your-mouth texture.
Step 3: Add Egg Yolk, Vanilla, and Red Coloring
Mix in the large egg yolk, vanilla extract, and liquid red food coloring until everything blends seamlessly. The red coloring transforms the dough into that iconic red velvet shade while the egg yolk adds richness.
Step 4: Combine Dry Ingredients
In a separate bowl, whisk together the all-purpose flour, unsweetened cocoa powder, baking powder, and salt. This ensures even distribution of the dry ingredients and brings out the tender crumb and classic subtle cocoa flavor.
Step 5: Form the Dough
Gradually add the dry ingredient mixture to your wet ingredients, stirring gently just until a soft dough forms. Be careful not to overmix, as you want to keep the cookies tender and soft.
Step 6: Prepare the Cheesecake Filling
Beat together softened cream cheese, granulated sugar, and vanilla extract until smooth and creamy. This luscious filling will be the perfect contrast against the rich red velvet cookie exterior.
Step 7: Shape the Cookies
Scoop tablespoon-sized balls of the dough and place them on your prepared baking sheets, spacing them about 2 inches apart. This spacing allows the cookies to spread without touching as they bake.
Step 8: Make the Thumbprints
Using your thumb or the back of a small spoon, gently press a shallow indentation into the center of each dough ball. This well will hold the delicious cheesecake filling, creating that signature thumbprint cookie appearance.
Step 9: Fill the Cookies
Add about ½ teaspoon of the cheesecake filling into each indentation on the dough balls. Be generous but careful not to overfill, so the filling stays put while baking.
Step 10: Bake to Perfection
Bake the cookies for 10 to 12 minutes, just until the edges are set but the centers remain soft. This ensures a tender cookie base with creamy cheesecake centers that don’t overcook or dry out.
Step 11: Cool Before Serving
Let the cookies cool on the pan for 5 minutes to firm up slightly, then transfer them to a wire rack to cool completely. Cooling fully allows the cheesecake centers to set perfectly for that smooth, luscious texture.
How to Serve Red Velvet Cheesecake Thumbprints Recipe
Garnishes
A sprinkle of powdered sugar or a drizzle of melted white chocolate makes a stunning finish. You can also add a few fresh berries or a mint leaf atop each cookie for a pop of freshness and visual appeal.
Side Dishes
Serve these thumbprints alongside a hot cup of coffee, tea, or even a creamy glass of milk. For gatherings, consider pairing them with a fruit salad or a rich chocolate mousse to amplify the indulgence.
Creative Ways to Present
Arrange the cookies on a festive platter with colorful napkins or in a tiered dessert stand to showcase their vibrant red and creamy centers. For parties, place a few on mini cupcake liners for easy individual servings that friends will adore.
Make Ahead and Storage
Storing Leftovers
Store your leftover Red Velvet Cheesecake Thumbprints Recipe in an airtight container at room temperature for up to 3 days. For longer freshness, refrigeration is ideal and can keep them perfect for up to a week.
Freezing
If you want to make these ahead of time, the cookie dough can be frozen before baking. Alternatively, fully baked cookies freeze well too—just layer them in a freezer-safe container with parchment paper between layers and freeze for up to 3 months.
Reheating
To enjoy your thumbprints warm, simply allow frozen cookies to thaw at room temperature and then warm briefly in a 300°F (150°C) oven for about 5 minutes. This light reheating brings back that fresh-baked feel without drying out the cheesecake centers.
FAQs
Can I substitute the red food coloring with natural alternatives?
Absolutely! You can use natural ingredients like beet juice or powdered beetroot for a similar vibrant red color. Just keep in mind that natural colorings might slightly alter the flavor and intensity of the red shade.
What if I don’t have cream cheese for the filling?
You can try a mascarpone cheese or ricotta cheese mixture as an alternative, but cream cheese is key to that classic tangy cheesecake flavor essential in this Red Velvet Cheesecake Thumbprints Recipe.
How do I prevent the cookies from spreading too much?
Make sure your butter is softened but not melted, and chill the dough briefly before baking if your kitchen is warm. Proper spacing on the baking sheet also helps keep the cookies from merging during baking.
Can these cookies be made gluten-free?
Yes, by swapping the all-purpose flour with a gluten-free flour blend suitable for baking. Just ensure the blend contains xanthan gum or another binder for structure and texture.
Are these cookies suitable for freezing after baking?
Definitely! Baked Red Velvet Cheesecake Thumbprints freeze beautifully and thaw well without losing texture or flavor, making them perfect for preparing in advance.
Final Thoughts
These Red Velvet Cheesecake Thumbprints Recipe cookies are truly a fun and scrumptious way to bring a little extra joy into your baking routine. Their mesmerizing color, tender texture, and luscious filling make them an absolute crowd-pleaser. Don’t hesitate to give this recipe a try—you’re bound to fall in love with every single bite!
Print
Red Velvet Cheesecake Thumbprints Recipe
- Prep Time: 20 minutes
- Cook Time: 12 minutes
- Total Time: 32 minutes
- Yield: 24 cookies
- Category: Dessert
- Method: Baking
- Cuisine: American
Description
These Red Velvet Cheesecake Thumbprints are deliciously soft and moist cookies with a classic red velvet flavor, topped with a creamy cheesecake filling. Perfect for festive gatherings or a sweet treat any time, they combine the rich taste of cocoa with the tangy smoothness of cream cheese in every bite.
Ingredients
Cookie Dough
- 1 cup (2 sticks) unsalted butter, room temperature
- 1⅓ cups granulated sugar
- 1 large egg yolk
- 1 teaspoon pure vanilla extract
- 2 teaspoons liquid red food coloring
- 2¼ cups all-purpose flour
- ¼ cup unsweetened natural cocoa powder
- ½ teaspoon baking powder
- ¼ teaspoon salt
Cheesecake Filling
- 4 oz (½ block) cream cheese, softened
- 2 tablespoons granulated sugar
- ¼ teaspoon pure vanilla extract
Instructions
- Preheat Oven: Preheat your oven to 350°F (175°C) and line baking sheets with parchment paper to prevent sticking and make cleanup easier.
- Cream Butter and Sugar: In a mixing bowl, beat the unsalted butter and granulated sugar together for 2–3 minutes until the mixture is light and fluffy, which helps create a tender cookie.
- Add Wet Ingredients: Mix in the egg yolk, pure vanilla extract, and liquid red food coloring until everything is well combined, giving the dough its signature red velvet color.
- Combine Dry Ingredients: In a separate bowl, whisk together the all-purpose flour, unsweetened cocoa powder, baking powder, and salt to evenly distribute the leavening and cocoa flavor.
- Make the Dough: Add the dry ingredients to the wet mixture and mix just until a soft dough forms, being careful not to overmix which can make the cookies tough.
- Prepare Cheesecake Filling: In another bowl, beat the softened cream cheese, granulated sugar, and vanilla extract together until smooth and creamy to create the filling.
- Shape Cookies: Scoop tablespoon-sized balls of dough and arrange them about 2 inches apart on the prepared baking sheets to allow for spreading.
- Create Indentations: Press a shallow indent into the center of each dough ball using your thumb or a small spoon to create a well for the filling.
- Fill Cookies: Spoon about ½ teaspoon of the cheesecake filling into each indentation, being careful not to overfill.
- Bake: Bake the cookies in the preheated oven for 10–12 minutes, or until the edges are set but the centers remain soft to keep them tender.
- Cool: Allow the cookies to cool on the baking pan for 5 minutes to firm up before transferring them to a wire rack to cool completely, ensuring they hold their shape and texture.
Notes
- You can substitute the liquid red food coloring with gel food coloring for a more vibrant color without adding extra liquid.
- Make sure the cream cheese is fully softened to avoid lumps in the cheesecake filling.
- If the dough feels too sticky, chill it in the refrigerator for 15–20 minutes before scooping.
- Store the cookies in an airtight container at room temperature for up to 3 days or refrigerate for up to a week.
- For a festive twist, sprinkle a little powdered sugar or edible glitter on top once cooled.


